Showing posts with label main dish. Show all posts

Monday, March 16, 2015

One Pot Garlic Alfredo Pasta

I saw this recipe and to be honest it mostly caught my attention because you could make the whole thing in one pot. How great is that? Even though I have a dishwasher now, I still dread dishes. I have to start dinner in a clean kitchen. All of the dishes have to be done and the counters have to be clean. But somehow, after dinner is ready, the kitchen is a disaster again. The mess never seems to end. This recipe not only keeps your kitchen clean, it is really yummy. My husband liked this better than my homemade alfredo sauce. We've been making this one quite a bit lately. This recipe came from The Cheese Pusher.


Creamy Garlic Pasta

Ingredients:
2 tsp olive oil
4 cloves garlic, minced
2 tbsp butter
¼  tsp salt
½ tsp pepper
3 cups chicken stock
½ lb spaghetti or angel hair pasta
1 cup grated parmesan cheese
¾ cup heavy cream
2 tbsp chopped fresh parsley

Directions:
In a pot, bring the olive oil to medium-low heat. Add the garlic and stir, allowing it to cook for 1-2 minutes. Mix in the butter until melted. Add the salt, pepper and chicken stock. Raise the heat to high and let it come to a boil. 
Once it is at a rolling boil, add the pasta and cook for as long as the box’s directions indicate. Reduce the stove to medium heat and mix in the parmesan until completely melted. Turn off the heat and stir in the cream and parsley. Serve immediately.


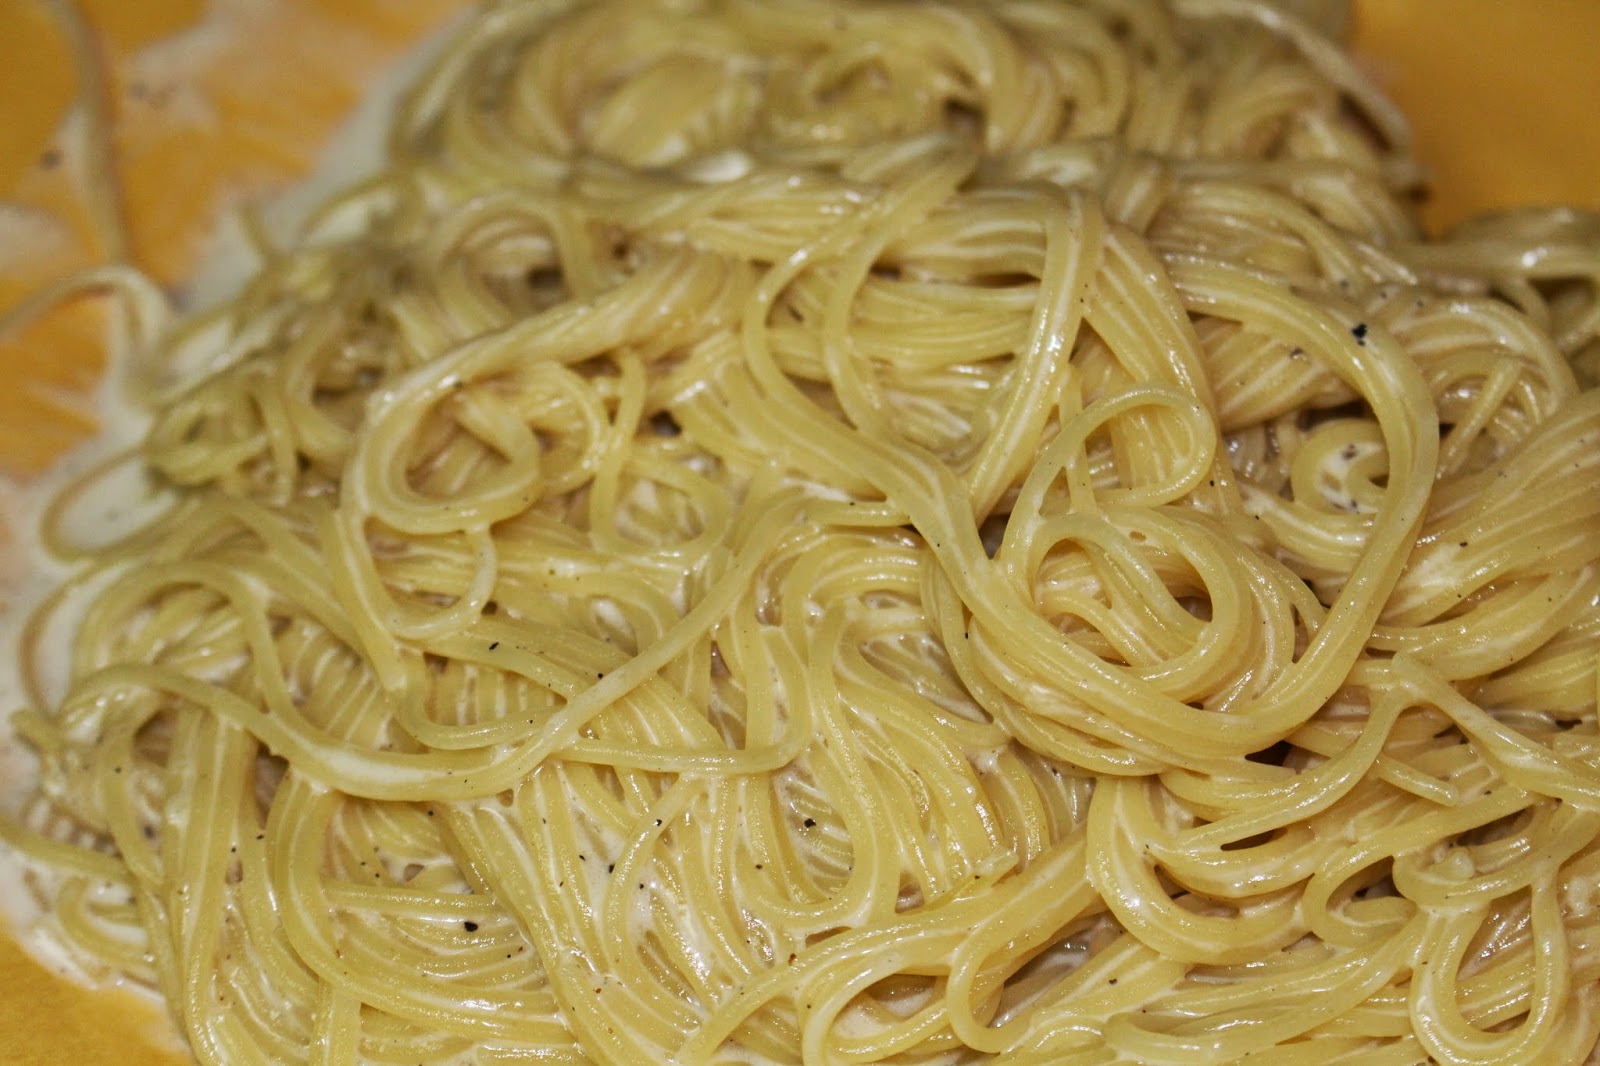
It may look a little runny like this at first but in just a few minutes it thickens up.
 

This recipe is the perfect amount for my husband and I. If you are going to make it for more than two people I would double or triple the recipe. 


Wednesday, November 12, 2014

Chow Mein Noodles- Better than Panda Express

When I saw this recipe I was very hesitant about the "Better than Panda Express," expression. But, you better believe it. A couple days after I made this I ate at Panda Express and their chow mein was not nearly as good. I've made this a couple of times already. It is really easy to whip up on a busy night. Thanks Damn Delicious for the recipe.

Ingredients:
  • 1/4 cup soy sauce
  • 3 cloves garlic, minced
  • 1 tablespoon brown sugar, packed
  • 2 teaspoons freshly grated ginger
  • 1/4 teaspoon white pepper
  • 2 (5.6-ounce) packages refrigerated Yaki-Soba, seasoning sauce packets discarded*
  • 2 tablespoons olive oil
  • 1 onion, diced
  • 3 stalks celery, sliced diagonally
  • 2 cups shredded cabbage- (this was about 1/4 head of cabbage)

 Directions:
  • In a small bowl, whisk together soy sauce, garlic, brown sugar, ginger and white pepper; set aside.
  • In a large pot of boiling water, add Yaki-Soba until loosened, about 1-2 minutes; drain well.
  • Heat olive oil in a large skillet over medium high heat. Add onion and celery, and cook, stirring often, until tender, about 3-4 minutes. Stir in cabbage until heated through, about 1 minute.

  • Stir in Yaki-Soba and soy sauce mixture until well combined, about 2 minutes.
  • Serve immediately.

Notes
*Yaki-Soba is ramen-style noodles and can be found in the refrigerated aisle of your local grocery store. My local Ralphs didn't have it but Vons did. The Yaki-Soba noodles I found came in a package with 3 (5.6 oz) packages. 
Other than finding the right noodles, this recipe is a piece of cake. It tasted great by itself but I'm going to pair it with beef and broccoli next time.


Wednesday, October 8, 2014

Taco Bowls

My husband and I tried to go on a fiscal fast for a month. We tried to see if we could live off of our food storage for a month. First of all, we had so much food in our cupboards we really needed to clean it out. Also, it was a good challenge to see if we could do it. We agreed that the only thing we would buy would be milk. If you know my husband, he can't live without his cereal. The day before we began, I went to the store and got a ton of fruits, vegetables and eggs. We ate the fruit right away but surprisingly the veggies lasted a long time. Some of the veggies I froze but we had veggies up until the last day of the month. It was pretty incredible. On the last day of our fiscal fast my husband and I agreed that we ate really well and that we could probably do it another month.

I should probably get the extra large tortillas for how much stuff I put in them.


One of the meals that was a go to when I couldn't think of anything to make was taco bowls. I bought these taco tins from Marshall's I think. They are really inexpensive. I think they were $5 for a set of 4 bowls. Anyway, I really like them. You can put olive oil on the tortilla and sprinkle it with chili pepper or garlic salt, or whatever seasoning you want. I usually just spray the tins with Pam and put the tortillas in without seasoning them. It's up to you.

Turn the oven to 450 degrees and put the tortillas in the oven for about 10  minutes. Check on the tortillas and take them out when the edges are beginning to brown.

You do not have to have tortillas to make this!!! By the end of our fiscal fast we were not putting our taco bowl in a tortilla shell but rather a cereal bowl.

Once you have your bowl, put whatever you would like in it. This is usually how I layer it.

cooked white rice
black beans


cheese (it melts on the beans and the rice)
lettuce
tomatoes
Doesn't get much better than home grown tomatoes right?
avocados
homemade buttermilk ranch (at the end of our fast we used a couple different dressings and they were all really good)
Tabasco


Let me know what toppings you put on your taco bowl.

Thursday, August 28, 2014

Italian Sloppy Joes

I had leftover sloppy joe sauce in my fridge and I was trying to figure out what to do with it. I came across this idea from The Pioneer Woman. This worked perfectly to use up our leftovers but I think next time I'll use homemade spaghetti sauce instead.


I used white homemade garlic bread as the base which made it taste amazing. I just put some butter and garlic salt on the bread and put it under the broiler for a few minutes. Then, I topped with the meaty sloppy joe sauce and sprinkled some mozzarella cheese on top. Then I put it back under the broiler for a couple of minutes to let the cheese melt. It was a really quick meal. I think I'm going to work on freezing some homemade spaghetti sauce this week. My husband has been asking me to do it for months and it's just one of those things I haven't gotten around to. Maybe I'll do it over the holiday weekend since he'll be leaving me for a boys trip.


Tuesday, August 19, 2014

Chicken Enchilada Quinoa Bake

I have been wanting to cook with quinoa for a while but it's just so expensive that I've been leaving it on my grocery list every time I go to the store. Finally I just gave in and bought it. This was the first thing I made. I saw it on Pinterest and it made my mouth water. When I'm hungry I should not be allowed to look at recipes, especially dessert recipes! Anyway, this recipe was delicious. I wish I had an awesome Mexican dish like the Pinterest picture though. I will say, it was delicious right out of the oven but it tasted even bettter as leftovers because all the juices soaked into the quinoa. So yummy!

The recipe came from Tablespoon.com

Chicken Enchilada Quinoa Bake

Ingredients:
2 tablespoons olive oil
1 small onion, finely chopped
2 1/2 cups cooked quinoa (white or red)
1 1/2 cups shredded cooked chicken breast
1 can (15 oz) black beans
1 can (4.5 oz) chopped green chiles
1 tablespoon chili powder
2 cups enchilada sauce (from 19-oz can)
1/2 cup shredded sharp Cheddar cheese (2 oz)
1 cup shredded pepper Jack cheese (4 oz)
Sour cream or plain Greek yogurt
Sliced avocado
Fresh cilantro
Crumbled cotija (white Mexican) cheese, if desire 


Directions: 
  • Heat oven to 350°F. Spray 13x9-inch (3-quart) ceramic or broiler-proof baking dish with cooking spray.
  • Heat 10- or 12-inch skillet over medium-high heat. Add oil and onion; cook 5 minutes or until onion is soft.
  • Reduce heat to low. Add quinoa, chicken, black beans, green chiles, chili powder and 2 cups of the enchilada sauce; stir to combine. Remove from heat.
  • Stir in Cheddar cheese. Transfer quinoa mixture to baking dish. Top evenly with pepper Jack cheese.
  • Bake 10 to 15 minutes.
  • Turn oven control to broil. Place baking dish about 5 inches from broiler; broil 1 to 2 minutes or until cheese is golden and bubbly. Remove from broiler. Top with sour cream, avocado, cilantro and cotija cheese. Serve immediately.
 
*This recipe is another easy one to prepare ahead and leave in the fridge until you are ready to bake it. It was great for a busy evening.  

Sunday, April 20, 2014

The BEST Stuffed Bell Peppers yet!

I have been wanting to make stuffed bell peppers recently but I was having a hard time finding the right recipe. I finally found one I liked but I still modified it a bit. I've made it twice already. It is pretty easy to make and it is so delicious. It surprisingly makes great leftovers as well.  Hope you guys like it. I got the original recipe from I Heart Nap Time.


Ingredients:

4 bell peppers halved length wise, ribs removed
1 cup cooked rice
1/2 pound grown turkey or ground beef
1 small onion
1 large tomato or 2 small tomatoes
1 14 oz can black beans drained and rinsed
1/2 TB cumin
2 tsp salt
1/2 TB olive oil
1/2 cup mozzarella shredded cheese or Italian blend cheese


And by the way, as I've stated before I really dislike tomatoes. But the tomatoes tasted really good in these. The seasoning made them blend right in and I didn't pick a single one out. Wahoo! I'm growing up.


Instructions
  1. Heat olive oil in a large saucepan. Add onion and cook until translucent ( about 3 minutes). Add in meat and cook until browned. Drain any excess grease.
  2. Add in black beans, tomatoes, rice, cumin, salt and pepper if desired. Stir until it's heated through. Try not to eat it by the spoonful. It is so delicious!
  3. Heat oven to 375. Place peppers in 13 x 9 baking dish. Spoon in filling and top with grated cheese. Cover pan with foil and bake for 40 minutes. I put the peppers on a cookie sheet and make a tent with the foil. Either way works.
  4. Remove from oven and enjoy! You can serve it with sour cream or salsa if desired.

Monday, April 14, 2014

Honey Lime Shrimp

I am all about easy make ahead dinners. When my little guy is asleep I try to do whatever I can to get dinner prepared. Yesterday, I decided to make a honey lime shrimp marinade for dinner. It was delicious. I only had enough time to let it marinade for 30 minutes before I cooked it but that was all it really needed because it tasted great. Today, I had a little bit of time this afternoon so I decided to make it again. It only takes about 5 minutes to get the marinade put together and then you just let it sit in the refrigerator until you are ready to cook it and it only takes a few minutes to cook. What could be easier?


I originally wanted to cook the shrimp on the grill but I was too anxious to eat it that I just dumped the whole bag of shrimp with the marinade into the pan to cook. It was delicious. I followed the recipe and just used 1/2 lb of shrimp but it was not really enough for two people. We each got about 7 pieces of shrimp. I would suggest doubling the recipe for two people.

I got the recipe from The Dough Will Rise Again


Ingredients:
1/2 pound large shrimp, peeled and deveined
1/4 cup olive oil
2 T honey
juice of one small lime, or half a large lime (2-3 T)
zest of one small lime, or half a large lime
2 cloves garlic, smashed
1/2 tsp kosher salt
1/4 tsp black pepper
1/4 tsp red pepper flakes

Directions:
1.) In a large ziploc bag, combine all the marinade ingredients. When everything is well-combined, add the shrimp, squeeze as much air as possible out of the bag, and close it up. Place it in the fridge.


2.) Let the shrimp marinate for 30-60 minutes, flipping the bag around once or twice during that time, so that all the shrimp stay evenly covered in the marinade.

3.) When you’re ready to cook, take the shrimp out of the fridge and let them sit at room temperature for about 10 minutes. Heat a large skillet over medium-high heat; there is no need to add any oil or butter to the pan, as the marinade has enough oil in it to keep the shrimp from sticking to the pan. (If you would prefer to use the grill for these, you can thread them onto skewers and toss them on the grill at this point.)


 4.) Add your shrimp to the pan in a single layer, making sure they are not too crowded; you can always cook them in more than one batch. Let them cook on one side for about a minute, until they curl up and start to turn pink. Flip them over, and cook for another 30 seconds or so, until the shrimp are opaque. Remove from the pan, and serve immediately!

I served our shrimp with a ceasar salad and green bean casserole. It was a great meal that took little preparation. I love those kind of dinners!

Tuesday, March 25, 2014

Pepperoni Penne

I am either really prepared for dinner, or my husband is on my way home and I'm looking in the cupboards, the fridge, searching pinterest, etc. trying to figure out what I'm going to make. I decided to make this and it was quick, easy and tasted so yummy.

I got this recipe from AllRecipes.

Now, I wasn't sure how this meal was going to turn out. I was kind of on the edge about even making it because it sounds a little bit like a kid's dish. Pepperoni penne? Anyway, it turned out really good and it tasted really fresh. When I served it to my husband he said, "This is Cheesecake Factory status."


I chopped up everything up ahead of time so when we were ready to eat, it only took about 15 minutes to make. I added a chopped green bell pepper because I had one chopped up in the fridge and I think it made the dish taste really yummy. I added it in with the shallot and garlic.I would also recommend making a little less than 16 oz of penne to go with it. A lot of the reviews said that there wasn't enough sauce with that much pasta. I made about 12 oz or 3/4 of a 1 lb box of penne. It was the perfect amount. 

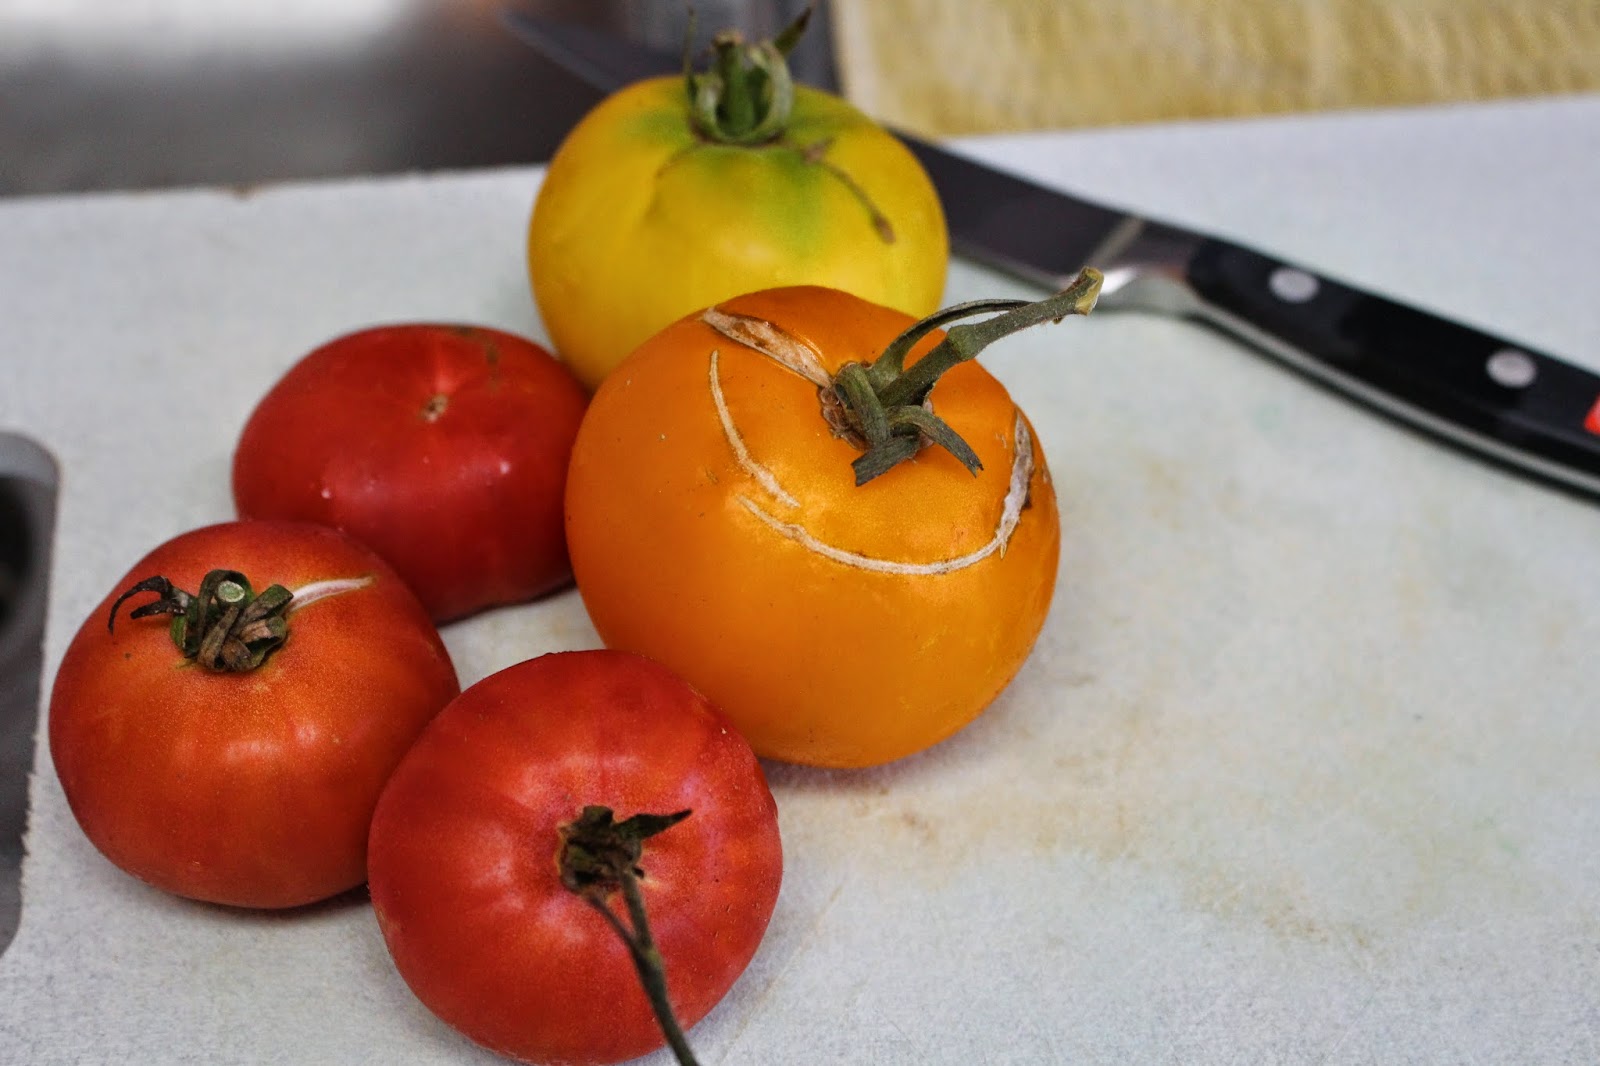
On a side note, I do not like tomatoes. I usually pick them out of things when I can taste them. The tomatoes made this sauce really yummy without being too powerful. I ate them without even noticing. Maybe you can trick your kids. Or, if you're like me, maybe you can trick yourself. It probably helps that we used tomatoes from our garden too.

I'm so proud of our tomatoes. Ever since we moved our tomato plant has been growing like crazy!


Ingredients:
3/4 lb sliced pepperoni sausage (I used Hormel sliced pepperoni's because that's all I had)
2 tablespoons minced shallots
4 medium tomatoes- peeled, seeded, and chopped
1 clove garlic, minced
1/4 cup chopped parsley
1 cup heavy cream
1 (16 oz) package penne pasta
2 tablespoons grated Parmesan cheese

Directions:
1. Cook the penne according to the package directions.

2. In a large skillet saute the pepperoni until crispy (about 5-8 minutes). Drain all but 1 tablespoon of the grease. Add the shallot and garlic. Cook until translucent. Stir in the tomatoes and simmer for about 3 minutes.

3. Stir in the cream and cook until reduced (about 8 minutes). Add the parsley and remove from the heat.

4. Add the drained pasta and toss. Garnish with Parmesan cheese.

Saturday, March 22, 2014

Grilled Chicken Fajita Kabobs and Balsamic Vinaigrette Salad

I have the hardest time cooking on the weekends. The weekends are a time to relax and recover. Sometimes I feel like I eat junk food all weekend because I'm too lazy to make something. This weekend I decided to plan ahead so that this didn't happen. I wanted something easy but delicious. I would agree that this met both of those criteria. I will definitely be making this again.

I cut up the peppers onion and chicken in the morning and placed them in the marinade. Then, when we got hungry inn the evening we put it on skewers, threw it on the grill and while it was cooking, I made the salad. Pretty simple. 

Marinated Grilled Chicken Fajita Kabobs
Recipe credit to Dashing Diet


Ingredients:
2 Tbsp olive oil
1 Tbsp fresh lime juice
2 tsp chili powder
2 tsp cumin
1/2 tsp garlic powder
1/2 tsp dried oregano
1/4 tsp salt
1/4 tsp pepper
1/4 ts red pepper flakes
2 lb chicken
bell peppers
onions

Directions:
Cut up peppers and onions into squares. I used green peppers because it was all I had, but you can make it as colorful as you want. Cut up chicken into squares. Place all other ingredients into a zip lock bag and mix around. Then, place chicken, onions and peppers into the marinade.

Let the chicken, onions and peppers marinate for at least 2 hours. Then, place the chicken, onions and peppers onto skewers and grill on medium high heat until done, about 8 minutes. Flip over half way to evenly cook all the way through.    


I paired this with a healthy Balsamic Vinaigrette salad.


Ingredients:
1 head of lettuce (I used green leaf lettuce. I also like it with red leaf lettuce or half green, half red)
1 apple
feta cheese
sliced almonds or pecans
balsamic vinaigrette dressing 

Directions:
wash and cut lettuce. Place into bowl. Cut up apple into small pieces discarding the core and seeds. Sprinkle feta cheese and sliced almonds or pecans over salad. Add dressing a little at a time and mix until combined.


Wednesday, February 19, 2014

Homemade Bread Bowls with Potato Soup


I came across a homemade bread bowl recipe on Pretty Providence and I have been wanting to try it for a while. Well, now that fall has come and gone, I finally decided to make them. The recipe came from Tastes Better From Scratch

Bread bowls:
Ingredients:
2 cups + 4 Tbsp warm water
2 packages of active dry yeast (about 2 Tbsp)
1/2 cup butter, melted
2 Tbsp sugar
3 tsp salt
6 1/2 cups all-purpose flour
In a large bowl add warm water and sprinkle in yeast. Set aside to “proof” or get foamy, about 10 minutes.  Add melted butter, sugar and salt and mix until combined.  Gradually add flour.  Knead with your mixer or by hand for about 5 minutes until dough is smooth and elastic. (you could do this by hand if you weren’t using a mixer, but it may get a little tiring!). Place in a large greased bowl. Cover, place in warm place and allow to rise until doubled, (about 45 minutes). After first rise punch dough down and form into 6 equal sized balls.  Place dough balls on a greased cookie sheet and lightly cover with plastic wrap. Let rise once more for about 20-30 minutes. DO NOT touch the dough at all during this time. Preheat oven to 425 degrees F and bake for 20-25 minutes, or until golden brown.  Let cool and then cut off the top, remove some of the bread from the inside and fill with your favorite soup! 


This recipe makes 6 bread bowls.
I used two bread bowls for dinner and froze the other four for the next time I need them. 

These rolls are really moist and delicious. When I  was scooping out the middle, I really had to hold myself back from eating it all. The center is the best part!


I made potato soup to go with the bread bowls, but there are so many options. This potato soup recipe came from my brother's cooking class in high school. As you can see, this recipe has gotten quite a bit of  use. I keep it in a plastic sheet protector now. At one point in college, the top right corner actually caught on fire because it was a little to close to the stove. I also thought the recipe was a good place to practice my signature, apparently.


Cream of Potato soup:
Ingredients:
2 medium potatoes, peeled and diced
3 Tbsp margarine
3 Tbsp flour
1/2 tsp salt
1/4 tsp celery salt
1 Tbsp dried onion
1/4 tsp pepper
2 cups hot milk (2 minutes in the microwave)
grated cheese for garnish

Directions:
Peel and cut up the potatoes into small cubes. Put in small pot with just enough water to cover the potatoes and cook (boil) for 10 minutes or until tender.

Drain the cooked potatoes in the colander and then return them to the small pot. Mash slightly with the potato masher.

In the medium pot melt the margarine on medium heat. Add the onion, salt, celery salt, and pepper. Stir with wire whisk. Add the flour and stir until the flour is absorbed into the margarine mixture.

When the butter begins to melt, put the milk in the microwave. Once the flour gets absorbed into the margarine mixture, if the milk isn't ready, it burns really easily and then you have to start over. This is the hardest part. I would also recommend having the spices and flour already measured out before this step to make it easier.  

Add the hot milk (milk should be heated in microwave for 2 min.) and turn the heat up to medium high or high. Stir constantly with the wire whisk until the milk boils and starts to thicken. Remove from the heat.

Add the potatoes to the milk mixture and stir until well mixed. Serve with cheese on top if desired.


Tuesday, January 14, 2014

Flank Steak Marinade

Tyrone and I got a grill for Christmas and we love it. One of our favorite grilling recipes is flank steak. This was a meal that my mom cooked a lot for us growing up. It is one of  my favorites. I called her in college to get the recipe and once I found out how easy it was, I loved it even more. I know most of the people out there are freezing this winter with the cold temperatures but it's been pretty warm here in Southern California. I feel like it's summer time. For those of you who can access your grills without having to tread across ice and snow... this is a great recipe. For those of you who are freezing, you can save it until summer time. I probably made this almost once a week in the summer time.


Ingredients: 
1 flank steak- sometimes certain grocery stores don't have it out. If you don't see it ask the butcher and they can usually get you one.
1/2 cup oil
1/2 cup fresh lemon (I usually just squeeze one lemon into the marinade with a fork)
1/2 cup soy sauce
2 cloves fresh garlic, minced
salt to taste
Directions: 
put all of the ingredients into either a pyrex dish or a ziplock bag. Let marinate for at least 2 hours. I usually do it the night before. Then, heat up the grill to about 400 degrees. Grill each side of the meat for about 5 minutes on high heat and it's done. We like our meat a little bit red in the middle. If you want it cooked more on the well side, cook for about 6-7 minutes on each side. After you pull the meat off the grill, cut into thin strips cutting against the grain of the meat. 

This is great for big barbeques because it feeds a lot of people. I usually make baked potatoes and a salad to go with it. It turns out being a delicious meal with little preparation.


Tuesday, January 7, 2014

Creamy Tomato Soup and Grilled Cheese

After I had my baby a friend of mine brought me a warm round bread loaf straight out of the oven along with some tomato bisque soup from Trader Joe's. I'm not really a tomato person though. It's probably one of the only foods that I think tastes absolutely gross by itself, at least. So, tomato soup has never really tastes good to me. But she brought me this wonderful smelling warm bread and I needed something to dip it in. I warmed up the tomato soup and dipped the bread into it. It was delicious! I think I ate the whole box of soup in two days. Ever since then I have been craving tomato soup. I decided to make some this week. It is really simple and easy.

Ingredients:
2- 14oz cans Del Monte diced tomatoes with basil garlic and oregano
1 Cup chicken broth
1/4 Cup butter
2 Tbs sugar
2 Tbs onion, chopped
1/8 tsp baking soda
1.5 Cups heavy cream


Sautee the butter and onions in a large saucepan. Mix in the tomatoes, broth, sugar and baking soda. Turn heat down to low and simmer for 30 minutes. Heat cream separately and add to tomato mixture just before serving. Puree the tomato mixture for a smooth soup.

TIP: I poured my tomato mixture into my blender when it was still hot and I think because it was so full some of the hot tomato mixture flew out of the top and burned the palm of my hand as well as sprayed red tomato sauce all over the front of me and all over the kitchen. I was already having kind of a rough day so I was not very happy. I would recommend blending up half the tomato sauce in the blender at a time if you have a smaller blender like me. I ended up putting a kitchen towel over the lid on the blender and finishing the job. Other than this little hiccup, this recipe was really easy and tasted great as a leftover.

Now, when I think of tomato soup I always think of grilled cheese. In college I would go over to my husband's apartment for lunch sometimes and he would make grilled cheese and soup. 
Then, when my mother in law was staying with me after I had my baby she made my husband and I grilled cheese sandwiches for lunch one day. She added a little bit of cream cheese in the middle though which tasted so delicious!! 

Grilled cheese sandwiches are pretty simple just DON'T BURN THEM! They burn really quickly if you aren't paying close attention. 

Ingredients:
2 pieces sandwich bread
Butter
Cheese, sliced - I use Colby jack but it can be done with any cheese of your choice
Cream cheese

Directions: 
Put butter on both sides of sandwich bread. Any sandwich bread will do. Place your pieces of bread down on a pan over medium heat or you can make them on a griddle which is my favorite way. Then, add sliced cheese and cream cheese to the top of one piece of bread. After about 30 seconds put the piece of bread without cheese on it on top of the cheese with the toasted side facing out. Leave on the griddle until the cheese is melted, about a minute. Make sure not to burn the bottom. It's as simple as that.

Wednesday, December 18, 2013

Pinto Beans and Polska Kielbasa

We are finally moved in. It was a three day process but it's finally done. The movers came and packed up our apartment one day, loaded the truck the next, and delivered all of our stuff at our new place the third day. But, on top of the craziness of moving, I got the flu the day they unloaded the truck. I hadn't been feeling well all morning but I really wanted to get as much unpacked and organized as I could. Finally I really thought I was going to hurl so I laid on the couch, which luckily came off the truck first, and I tried to take a nap. Then, sure enough, just after the movers left, I was sick all day. Great way to break in the new place right?

Luckily it was just a one day thing. I was able to unpack a little bit more the next day and go to Tyrone's holiday party. After the holiday party we headed back to our old apartment to pick up the last of our things that the moving company couldn't take for us and then we headed home. We didn't get home until about 12:30am. We were exhausted.

Then, Sunday after church Tyrone was dying for a home cooked meal because we had eaten out for almost a week straight. I looked in the cupboards and they were completely full but there was nothing in there to make a meal out of. All that was in the fridge was condiments, bottled water, and left over taco meat from Tyrone's work party. To make things simple we had left over taco meat on rice. It worked. That night we were dying for real food. But, with an empty fridge it was hard to make anything. We sadly ate junk food and went to bed.  

On Monday morning I HAD to go to the grocery store! That was the number one priority. I had to at least get the basic necessities. I found Polska Kielbasa on sale that I ended up snagging. I used it that night in a super easy recipe. My house was still not quite put together so I was trying to do a quick, hearty but easy meal. This was a hit. It was great as a left over too. 

,


Ingredients:
1- 16oz bag of pinto beans
8 cups water
1 jar salsa (I used chunky. You could use picante sauce as well)
1 polska kielbasa link, cut into small circles
1 green bell pepper, chopped
1 onion, chopped (optional)
cheese, (optional)

Directions: 
Rinse beans, taking out the rocks and misshaped beans. Place beans along with the water and salsa into the crock pot. Cook on low for 8 hours. Place the Polska Kielbasa, green pepper, and onion into the crock pot for the last hour to cook . Top with cheese if desired.
 

Monday, December 2, 2013

Thanksgiving 2013

Thanksgiving this year was awesome! In June I was getting ready for this new baby of ours and I thought that we should pick a date for his baby blessing in church so that our family could mark their calendars. We decided to bless him on December 1st which would only be a few days after Thanksgiving. With that in mind, we decided to host Thanksgiving here in Huntington Beach. I was not sure how it was going to turn out at all. I've only cooked a turkey once before in college but that's pretty much it.

Thanksgiving morning I put the turkey in the oven roaster and started getting things ready.
I rubbed the outside of the turkey with olive oil and then I seasoned it with an Italian herb seasoning, fresh grated garlic, and salt and pepper. I chopped up half an onion, two carrots, and a celery stick and placed them inside the bird with Italian seasoning as well to keep the moisture in. Then, I cooked it in the roaster oven at 350 degrees for about 4.5 hours.

Mr. Tyrone carving the turkey

To make Thanksgiving fun for the kids I made a turkey vegetable tray and a turkey caramel apple dip. I got the idea for the vegetable tray from Eating with food allergies. Everyone loved it. They were also pretty simple too. Tyrone had to help me with the turkey face on the vegetable tray though. He's much better at artistic stuff than I am.


On the table I used wide wrapping paper that I had found at the dollar store. I had bought brown craft paper at the dollar store a while back but when I went to pick some up they didn't have anymore so I went with the most Thanksgiving looking wrapping paper they had. This was basically the only one that didn't have any sort of Christmas print on it. It worked fine. Then I bought a big roll of ribbon at Sam's Club to tie bows around the back of the chairs. Again, all they had was Christmas ribbon so I went with the most Thanksgiving looking one.


For the table settings I bought napkins at Bed Bath and Beyond. Then, I made some "Give Thanks" burlap napkin rings. I'm not really that good at crafts like this but they ended up turning out really nice. I had a hard time finding the charms to go on the napkin rings like the tutorial shows but I think that just the ribbon looked nice. I got the tutorial from two it yourself.
 
On each plate I placed a small treat bag filled with "acorns." I used a Hershey's kiss, a small nutter butter and a mini chocolate chip held together by peanut butter. I put 6 in each bag. My father in law loved them. He took all the ones that were left on the table and hid them in the bushes. This is not a joke. I'm glad they were a hit.


Overall I think it turned out great! The weather was gorgeous and it was so much fun to have everyone here in Huntington Beach. Our one bedroom apartment was quite squishy at times but no one complained and I think it was nice to have everyone so close. It's going to be hard to say goodbye to this little place. There are a lot of memories here.
The whole family!

Thursday, October 24, 2013

Teriyaki Salmon

My husband isn't a  huge fan of how full I can get our freezer. It's always pretty stuffed. So, I decided to start using up a lot of the stuff that I have in there. I don't think it's the amount of stuff in there but there are so many odd shaped things that it doesn't fit together very well and things are always falling.

I had frozen rice and frozen salmon in the freezer that I decided to incorporate into a meal last night. It turned out delicious and was so easy! Easy meals are a must now with this little guy demanding all of my attention. I'm not complaining though. This little one is so much fun!

I got the recipe from Damn Delicious

Ingredients:
  • 1 tablespoon cornstarch
  • 1/4 cup soy sauce
  • 1/4 cup brown sugar, packed
  • 1/2 teaspoon ground ginger
  • 1/4 teaspoon garlic powder
  • 2 tablespoons honey 
  • 1 cup water
  • 2 salmon filets
  • Cooked rice, for serving
  • Sesame seeds, for garnish
  • Sliced green onions, for garnish 

Directions:

  • In a small saucepan over medium heat, add the soy sauce, brown sugar, ginger, garlic powder, honey and 1 cup water; bring to a simmer.
  • Stir in the cornstarch until thickened enough to coat the back of a spoon, about 2 minutes. Let cool to room temperature.
  • In a gallon size Ziploc bag or large bowl, combine the teriyaki marinade and salmon filets; marinate for at least 30 minutes to overnight, turning the bag occasionally. (Instead of using salmon filets I used a longer, thinner piece of salmon so I put it in a 9x13 baking dish, poured the teriyaki sauce on top, covered with saran wrap and let it marinade in there about an hour before baking. It turned out great!)
  • Preheat the oven to 400 degrees F. Lightly coat an 8×8 baking dish with nonstick spray.
  • Place the salmon filets along with the marinade onto the prepared baking dish and bake until the fish flakes easily with a fork, about 20 minutes.
  • Serve the salmon immediately with rice.

Sunday, October 6, 2013

Steamed Lobster Tail


My husband went on a lobster trip with some of his cousins last year off Catalina Island. He brought back delicious scallops and lobster. We had eaten all of the scallops and lobster tails, except for two, soon after his return. As my husband and I were trying to decide what to do for our three year wedding anniversary this year and we decided to stay at home and celebrate with the last two lobster tails. I was going to be 36 weeks pregnant and since we had done big things the past two years to celebrate we were alright with doing something small.

Well, as some of you know, our little bundle of joy decided to come 4 weeks early on our wedding anniversary. Needless to say, we did not have lobster tail, instead we had a steak celebratory dinner at the hospital with a bottle of sparkling cider. It was so delicious after almost two days of eating nothing.

Well, two and a half weeks later we decided to make our lobster tails. They were delicious and easy. We decided to steam them instead of grill them this time and I liked them much better.

Ingredients: 
Lobster tail
Butter
Garlic

Directions:
Fill a pot half way with water. Bring to a boil and fit the top of the pot with a steam chamber, steam basket, or use a colander.

Place lobster tails in steam chamber, basket, or colander. Cover with lid.

Steam lobster tails for 5-7 minutes. I used a colander and some of the holes were not completely covered so I steamed our tails for 7 minutes and it was perfect. Remove the lobster tails from the steamer and rinse with cold water. There will be a grey, stringy film on the outside of the tails when you take them out, you can take this off under cold running water.

serving suggestions:
We enjoy our lobster tails with lemon garlic butter. We mix grated garlic and melted butter in a bowl and then brush it onto the lobster tails.


Monday, September 9, 2013

Whole Chicken in Crockpt

This is one of my favorite Sunday recipes. Anything in the crockpot is easy but this one takes about 3 minutes to prepare. There is nothing to chop, unless you want to add vegetables to it.

Ingredients:
1 small whole chicken- (make sure it fits in the crockpot and you can still put the lid on)
Lawry's seasoned salt
pepper
1 cup water

place three small tin foil balls in the bottom of the crockpot. Pour 1 cup water into the crockpot. Season the chicken with Lawry's seasoned salt and pepper. Place chicken on top of tin foil balls. Cook on low for 8-10 hours. I can promise you that this chicken will be close to the most tender chicken you've ever had in your life, if not the most tender. It just falls apart. It makes a great dinner and great leftovers. Sometimes I'll shred the chicken and freeze it or use it for enchiladas the next day. It's also nice to save the water at the bottom of the crockpot. It makes for a great chicken broth. I would just strain out any chicken pieces that are left in it.

I added corn and a side salad to it to make a complete meal. We had a great meal that only took probably 10 minutes total. These kinds of dinners are my favorite! If you decide to try it let me know how your chicken turns out!

Tuesday, September 3, 2013

Pan Roasted Chicken with Lemon Garlic Green Beans

I kid you not this is one of the best dishes I think I have ever made. It is seriously to die for! It's pretty simple too which I love. This is one of those meals I can make around lunch time and then stick in the fridge until my husband's headed home from work and then I just throw it in the oven and dinner is ready when he gets home. Although when I texted my husband today to see when he would be home, he said he had a work meeting and wouldn't be home until late so I ate this dish all by myself and loved it! I sure wasn't feeling guilty about going back for seconds!

I hope you guys enjoy this recipe as much as I did. I was worried that it wouldn't have enough flavor but that is definitely not a problem. I'm not sure if it's because I made it ahead of time and let it marinade in the lemon for a few hours before I cooked it, but it was full of flavor!

I got  the recipe from Real Simple
Ingredients:
  • 6 tablespoons olive oil
  • 2 lemons, 1 thinly sliced, 1 juiced
  • 4 cloves garlic, minced
  • 1 teaspoon kosher salt
  • 1/2 teaspoon freshly ground black pepper
  • 3/4 pound trimmed green beans (I used a can because it was all I had)
  • 8 small red potatoes, quartered (I used 3 regular potatoes)
  • 4 chicken breasts (bones left in, with skin, about 3 1/4 pounds) (I used 2 breasts and 3 legs) 
  • Directions

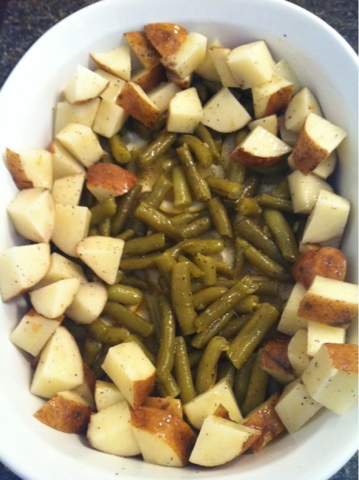
    1. Preheat oven to 450°F. Coat a large baking dish or cast-iron skillet with 1 tablespoon of the olive oil. Arrange the lemon slices in a single layer in the bottom of the dish or skillet.
    2. In a large bowl, combine the remaining oil, lemon juice, garlic, salt, and pepper; add the green beans and toss to coat. Using a slotted spoon or tongs, remove the green beans and arrange them on top of the lemon slices. Add the potatoes to the same olive-oil mixture and toss to coat. Using a slotted spoon or tongs, arrange the potatoes along the inside edge of the dish or skillet on top of the green beans. Place the chicken in the same bowl with the olive-oil mixture and coat thoroughly. Place the chicken, skin-side up, in the dish or skillet. Pour any of the remaining olive-oil mixture over the chicken.
    3. Roast for 50 minutes. Remove the chicken from the dish or skillet. Place the beans and potatoes back in oven for 10 minutes more or until the potatoes are tender. Place a chicken breast on each of 4 serving plates; divide the green beans and potatoes equally. Serve warm.   (I baked mine for 50 minutes and the potatoes were already tender so I didn't have to bake for another 10 minutes. I don't know if I could have waited any longer to eat it anyway, the lemon chicken aroma coming from the oven was making my stomach growl.)
     

Thursday, August 22, 2013

Hearty chili

This an awesome chili recipe for the men in your life! It is really hearty and filling! I was asked to bring chili to a Halloween party a few years ago and I found this recipe. Since then I have made it quite a few times. I usually serve it with a little bit of melted cheese on top and some cornbread. This is an easy dinner for those nights when you don't have much time or can't think of anything. Most of the ingredients I usually have on hand too so that helps!

I got this recipe off of the Big Oven app but you can find it here on their website as well.

Ingredients:

1 pound Lean ground meat
1 large Onion chopped
1 tablespoon Chili powder
1 tablespoon Ground cumin
1/2 pound Smoked sausage (I like to use Polska Kilbasa instead)
1 12-oz can Kidney beans or Ranch Style beans
1 cup Pace's picante sauce
1 cup V-8 vegetable juice
1 8 ounce can Tomato sauce

Serves: 6

Preparation:
Brown ground meat with onion in large sauce pan or dutch oven.  Sprinkle chili powder and cumin over meat while cooking and stirring for about 2 minutes.  Slice and quarter the smoked sausage.  Add remaining ingredients and bring to a boil.  Reduce and simmer uncovered for 20 minutes.  Add a little water if it gets too thick.

I have used smoked sausage and it tastes really yummy. I usually prefer polska kilbasa though. This last time I made this I realized that I didn't have any picante sauce on hand. You know the feeling when you thought you had all the ingredients and when you are in the middle of making it you realize you are missing something? So frustrating. Instead of picante sauce I used a jar of mild salsa and I honestly couldn't tell the difference. If substituting salsa for picante sauce I would just make sure it isn't chunky salsa.

Thursday, July 25, 2013

Potstickers


Tyrone and I took a trip to New York in January and while we were there we ate at this delicious restaurant in China town. I can't even tell you the name of it because it was in Chinese. Some friends of ours took us there and told us that the potstickers were the best. They told us what to order because again, nothing was really in English. I was shocked with how yummy they were. Ever since then, I have been craving them. 
Recently, we went out to lunch with some friends to a Japanese restaurant and they had gyoza, which I found out is basically the same thing as a potsticker. Then there are dumplings, which are yummy as well, dumplings are made the same way as a potstickers but they are steamed or boiled rather than fried.  I prefer the fried because I like the crunchy outside. Both are very delicious though, it just depends on preference. 

I decided to try and master potstickers yesterday afternoon. I knew it was going to be a lot of work so I was hoping that they would turn out yummy. They did! Sometimes I'll try really complicated recipes that take all day only to have it flop in the end. Those are disappointing days because I have nothing to show for and nothing to serve for dinner. These potstickers take a lot of work but they are not too difficult. If I can do it I think almost anyone can. 

I decided to make the potstickers homemade, from the filling to the wraps. The wraps do take a lot of time, but they really aren't that difficult. I learned how to make the potstickers from Use Real Butter

She has great pictures and descriptions. I would check out her page if you get a chance. She goes into much greater detail than I'm going to. I'm just going to go over the main parts. 

On Use Real Butter she has a recipe for a shrimp filling as well if you would rather do that instead. I used the pork filling so that's the only one I've posted on here.

Pork filling: 
1 lb ground pork
4 large napa cabbage leaves, minced
3 stalks green onions, minced
7 shitake mushrooms, minced (if dried – rehydrated and rinsed carefully)
1/2 cup bamboo shoots, minced
1/4 cup ginger root, minced
3 tbsp soy sauce
2 tbsp sesame oil
2 tbsp corn starch


The most time consuming thing of this entire process is chopping up all of these ingredients. Everything needs to be really small.

For the dough: 
4 cups flour
1 cup water
This will be enough for the filling recipe made with 1 lb of pork meat.
Mix the dough until it is smooth but firm. I had to add a little bit more water at a time until the dough stayed together. Depending on the climate you are cooking this in, the water amount could change as well. 
 Form the dough into a ball. Cut the ball into 4 even pieces. Take those 4 pieces and roll them out length wise into 1 1/4 in diameter. Then cut the rolls into 3/4 in pieces. Below are my 3/4 in pieces smashed into round balls. Now, I am no expert in rolling out dough. My round pieces are not perfectly round, as you can see, but they worked. They also recommended to roll the edges thinner and leave the middle thicker but I skipped that. I just rolled them out and they worked fine. I didn't have any problems with them tearing.


I was surprised with how good the wrapping turned out. If mine can look like this I'm sure yours will be much better.
Make sure you go to Use Real Butter to find out how to pleat the edges of your potstickers. She does a great job of explaining how to do it with pictures.

Now that you've made the delicious potstickers, lets cook them.
If making potstickers, heat up about 2-3 tbsp of oil in the bottom of a large, deep non-stick frying pan on medium- high heat. Cook the potstickers until the bottom of them turn a golden brown. Once the bottom is a golden brown, quickly pour 1/2 cup of water into the pan all at once. Make sure to stand back as you do this, the oil will want to pop everywhere. Then, immediately put on the lid and keep covered until all the water has cooked out. When the water has cooked out, take off the lid and turn the temperature to low-medium heat and cook for an additional 2-3 minutes.

If making dumplings instead of potstickers, bring a large pot of water to a boil, place dumplings into the pot. When the dumplings float, they are done. Simple enough, right?

Dipping Sauce:
1/4 cup soy sauce
1/8 cup red wine vinegar
a few drops of sesame oil
1 tsp minced garlic

This is what I used for the dipping sauce. There are a lot of varieties you could use.

some optional additions for the dipping sauce would be:
minced green onions
chili garlic paste
sugar
minced ginger

Here is the guinea pig enjoying his potstickers