Showing posts with label recipes. Show all posts

Monday, March 23, 2015

Snickers Cake

I went to a cake auction fundraiser this past Friday and I signed up to bring a cake. Last year I went to this fundraiser and I brought a cake but I went for looks. I brought a beach themed cake with what looked like water and sand on top. Then I had teddy grahams lying out on fruit by the foot and teddy grahams in inner tubes (watermelon rings.) Then I had palm trees and little drink umbrellas on the side. It turned out pretty awesome.

This year I wanted to make more of an adult cake. I decided to make a snickers cake. I used the recipe from Brown Eyed Baker to make this cake. The only thing I changed was the chocolate cake recipe. I used a simple chocolate cake recipe from Nellie Bellie.


Ingredients for the chocolate cake:

  1. 3/4 cup soft butter
  2. 3 eggs at room temperature
  3. 2 c. all-purpose flour
  4. 3/4 cup cocoa
  5. 1 tsp baking soda
  6. 3/4 tsp baking powder
  7. 1/2 tsp salt
  8. 2 cup sugar
  9. 2 tsp vanilla
  10. 1 1/2 cup milk
 
Directions:
  1. Using three 8 inch pans, grease bottom of pans. preheat oven to 350 degrees
  2. Beat butter for 30 seconds or so. slowly add sugar.
  3. Add eggs 1 at a time beating after each one. Beat in vanilla.
  4. Add dry ingredients beating after each addition.
  5. Add 1/2 of the milk, beat. Then add the other 1/2. Beat just until everything is combined nicely.
  6. Spread batter evenly into pans.
  7. Bake for 30-35 minutes for round pans. Watch it though! a knife coming out clean from the center means it is done.
 
Now the snickers part of the cake:
 
There are four main parts
 
First,
The Nougat Filling
Ingredients:
4 tablespoons unsalted butter
1 cup granulated sugar
¼ cup evaporated milk
1½ cups marshmallow fluff
¼ cup creamy peanut butter
1 teaspoon vanilla extract
1½ cups salted peanuts, roughly chopped
 
Directions:
Melt the butter in a medium saucepan over medium heat. Add the sugar and evaporated milk, stirring until dissolved, and bring to a boil. Reduce the heat to low and cook for 5 minutes, stirring occasionally. Remove the pan from heat and add the marshmallow fluff, peanut butter, and vanilla extract, stirring until completely smooth. Fold in the peanuts. Let the nougat mixture cool to room temperature before using it in the cake. You can do this leaving it at room temperature or you can pop it into the refrigerator to speed up the process. Be sure to give a stir occasionally as it cools.
 I think this nougat filling is what makes this cake taste so good. I ate a couple spoonfuls out of the pan.
 
Second,
Salted Caramel Buttercream Frosting
Ingredients:
½ cup unsalted butter, at room temperature
4 ounces cream cheese, at room temperature
¼ cup salted caramel sauce
2 cups powdered sugar
 
Directions:
Beat together the butter and cream cheese on medium-high speed for 5 minutes. Pour in the salted caramel and beat until combined. Reduce the speed to medium-low and slowly add the powdered sugar, a little at a time, until it has all been incorporated. Increase the speed to medium-high and beat for an additional two to three minutes, until light and fluffy.
 
Third,
Assemble the Cake
 If your cakes baked up uneven or have domed on top, level off the tops. Place one cake layer on a serving plate. Cover with half of the nougat filling and then spread a couple spoonfuls of the salted caramel sauce over top to evenly cover the nougat filling. (When I spread the nougat filling on, I pushed it all the way out to the sides of the cake, but when I put the next layer on, it pushed the nougat filling out and down to the bottom. I would recommend not pushing the nougat filling all the way out to the side. The weight of the layers will push it out to the side.)Top with a second cake layer and cover with the remaining nougat filling and top with caramel sauce. Place the final cake layer on top face-down. Frost the cake with the salted caramel frosting, finishing it as smoothly as possible. Refrigerate the cake for at least 1 hour, until the frosting is set.
 
Fourth,
Chocolate Ganache
Ingredients:
8 ounces milk chocolate, finely chopped
4 ounces (½ cup) heavy cream
 
Directions:
While the cake chills, make the chocolate ganache. Place the chocolate in a medium bowl; set aside. Place the cream in a small saucepan over medium heat and warm until it just comes to a boil. Pour the cream over the chopped chocolate and let sit for 2 minutes. Begin whisking the mixture in the center, gradually working your way outward until the ganache is completely smooth. Set aside to cool, whisking occasionally, until it has thickened slightly, yet still a pourable consistency.
 
Transfer the ganache to a 2-cup measuring cup. Slowly pour the chocolate ganache into the center of the cake, letting it push itself outward and flow over the sides of the cake. Refrigerate the cake for at least 30 minutes, giving the ganache a chance to set up. To finish garnishing, drizzle some additional salted caramel sauce over the top and side of the cake, and top with chopped peanuts. Keep the cake refrigerated, removing it from the refrigerator about 20 minutes prior to serving.


Monday, March 16, 2015

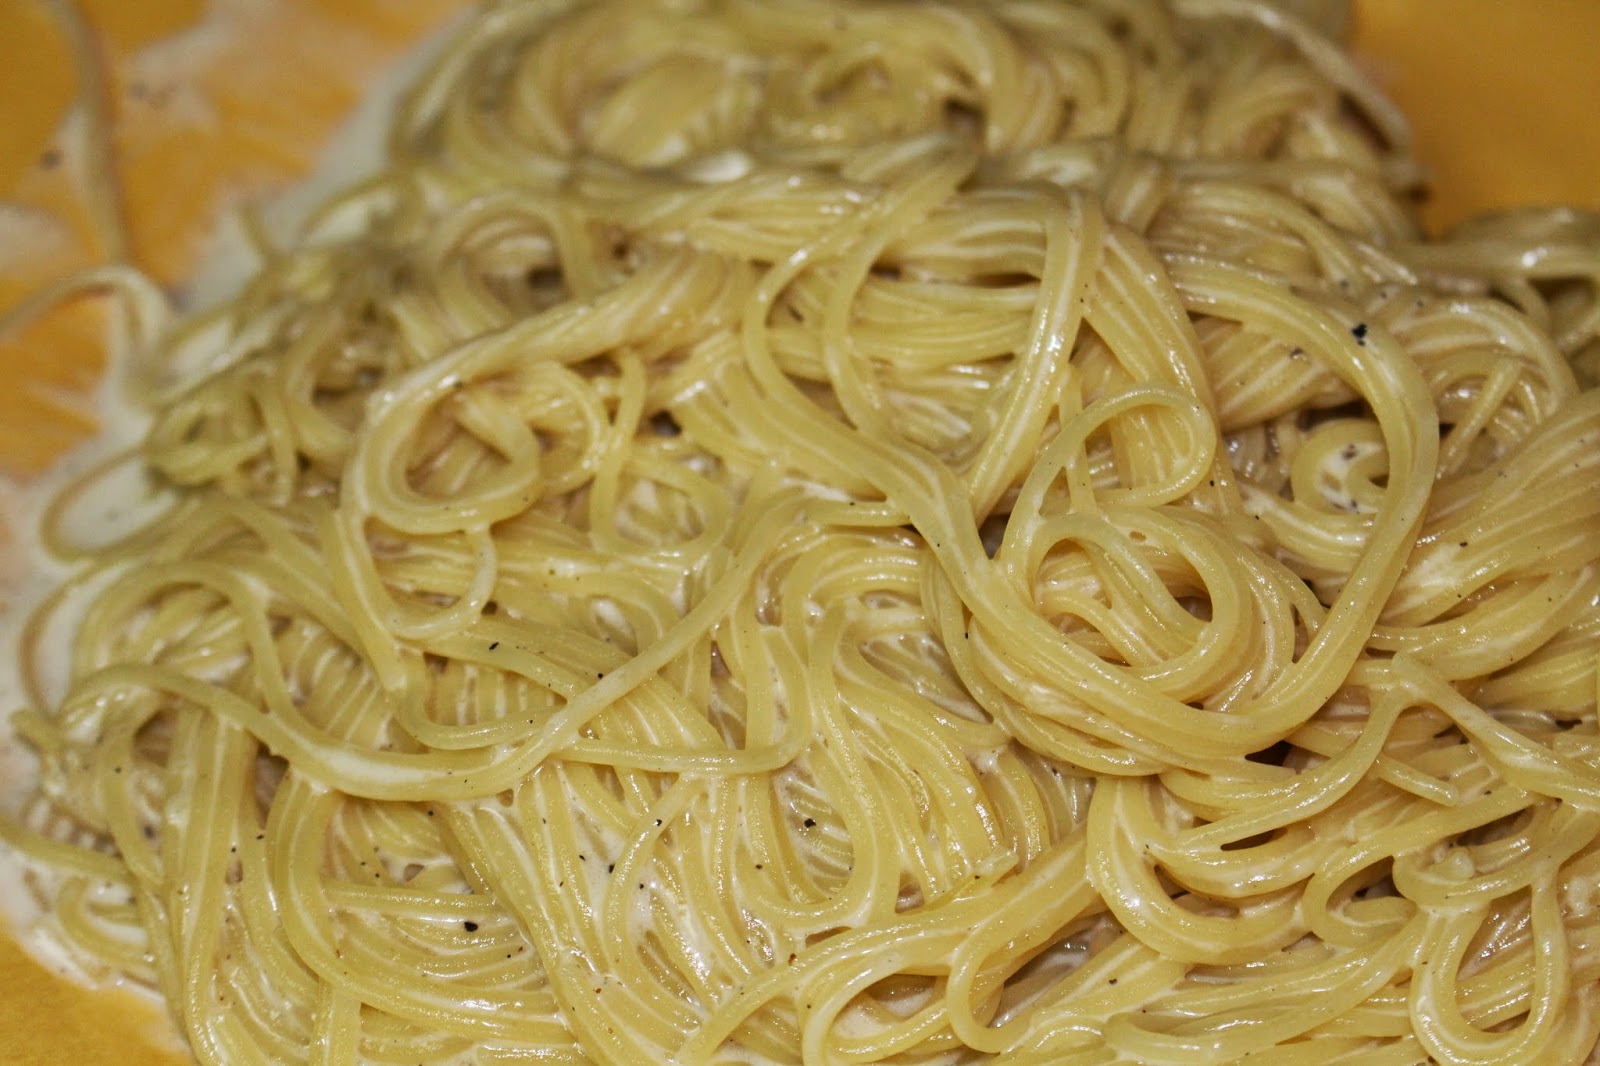
One Pot Garlic Alfredo Pasta

I saw this recipe and to be honest it mostly caught my attention because you could make the whole thing in one pot. How great is that? Even though I have a dishwasher now, I still dread dishes. I have to start dinner in a clean kitchen. All of the dishes have to be done and the counters have to be clean. But somehow, after dinner is ready, the kitchen is a disaster again. The mess never seems to end. This recipe not only keeps your kitchen clean, it is really yummy. My husband liked this better than my homemade alfredo sauce. We've been making this one quite a bit lately. This recipe came from The Cheese Pusher.


Creamy Garlic Pasta

Ingredients:
2 tsp olive oil
4 cloves garlic, minced
2 tbsp butter
¼  tsp salt
½ tsp pepper
3 cups chicken stock
½ lb spaghetti or angel hair pasta
1 cup grated parmesan cheese
¾ cup heavy cream
2 tbsp chopped fresh parsley

Directions:
In a pot, bring the olive oil to medium-low heat. Add the garlic and stir, allowing it to cook for 1-2 minutes. Mix in the butter until melted. Add the salt, pepper and chicken stock. Raise the heat to high and let it come to a boil. 
Once it is at a rolling boil, add the pasta and cook for as long as the box’s directions indicate. Reduce the stove to medium heat and mix in the parmesan until completely melted. Turn off the heat and stir in the cream and parsley. Serve immediately.


It may look a little runny like this at first but in just a few minutes it thickens up.
 

This recipe is the perfect amount for my husband and I. If you are going to make it for more than two people I would double or triple the recipe. 


Wednesday, November 12, 2014

Chow Mein Noodles- Better than Panda Express

When I saw this recipe I was very hesitant about the "Better than Panda Express," expression. But, you better believe it. A couple days after I made this I ate at Panda Express and their chow mein was not nearly as good. I've made this a couple of times already. It is really easy to whip up on a busy night. Thanks Damn Delicious for the recipe.

Ingredients:
  • 1/4 cup soy sauce
  • 3 cloves garlic, minced
  • 1 tablespoon brown sugar, packed
  • 2 teaspoons freshly grated ginger
  • 1/4 teaspoon white pepper
  • 2 (5.6-ounce) packages refrigerated Yaki-Soba, seasoning sauce packets discarded*
  • 2 tablespoons olive oil
  • 1 onion, diced
  • 3 stalks celery, sliced diagonally
  • 2 cups shredded cabbage- (this was about 1/4 head of cabbage)

 Directions:
  • In a small bowl, whisk together soy sauce, garlic, brown sugar, ginger and white pepper; set aside.
  • In a large pot of boiling water, add Yaki-Soba until loosened, about 1-2 minutes; drain well.
  • Heat olive oil in a large skillet over medium high heat. Add onion and celery, and cook, stirring often, until tender, about 3-4 minutes. Stir in cabbage until heated through, about 1 minute.

  • Stir in Yaki-Soba and soy sauce mixture until well combined, about 2 minutes.
  • Serve immediately.

Notes
*Yaki-Soba is ramen-style noodles and can be found in the refrigerated aisle of your local grocery store. My local Ralphs didn't have it but Vons did. The Yaki-Soba noodles I found came in a package with 3 (5.6 oz) packages. 
Other than finding the right noodles, this recipe is a piece of cake. It tasted great by itself but I'm going to pair it with beef and broccoli next time.


Wednesday, October 8, 2014

Taco Bowls

My husband and I tried to go on a fiscal fast for a month. We tried to see if we could live off of our food storage for a month. First of all, we had so much food in our cupboards we really needed to clean it out. Also, it was a good challenge to see if we could do it. We agreed that the only thing we would buy would be milk. If you know my husband, he can't live without his cereal. The day before we began, I went to the store and got a ton of fruits, vegetables and eggs. We ate the fruit right away but surprisingly the veggies lasted a long time. Some of the veggies I froze but we had veggies up until the last day of the month. It was pretty incredible. On the last day of our fiscal fast my husband and I agreed that we ate really well and that we could probably do it another month.

I should probably get the extra large tortillas for how much stuff I put in them.


One of the meals that was a go to when I couldn't think of anything to make was taco bowls. I bought these taco tins from Marshall's I think. They are really inexpensive. I think they were $5 for a set of 4 bowls. Anyway, I really like them. You can put olive oil on the tortilla and sprinkle it with chili pepper or garlic salt, or whatever seasoning you want. I usually just spray the tins with Pam and put the tortillas in without seasoning them. It's up to you.

Turn the oven to 450 degrees and put the tortillas in the oven for about 10  minutes. Check on the tortillas and take them out when the edges are beginning to brown.

You do not have to have tortillas to make this!!! By the end of our fiscal fast we were not putting our taco bowl in a tortilla shell but rather a cereal bowl.

Once you have your bowl, put whatever you would like in it. This is usually how I layer it.

cooked white rice
black beans


cheese (it melts on the beans and the rice)
lettuce
tomatoes
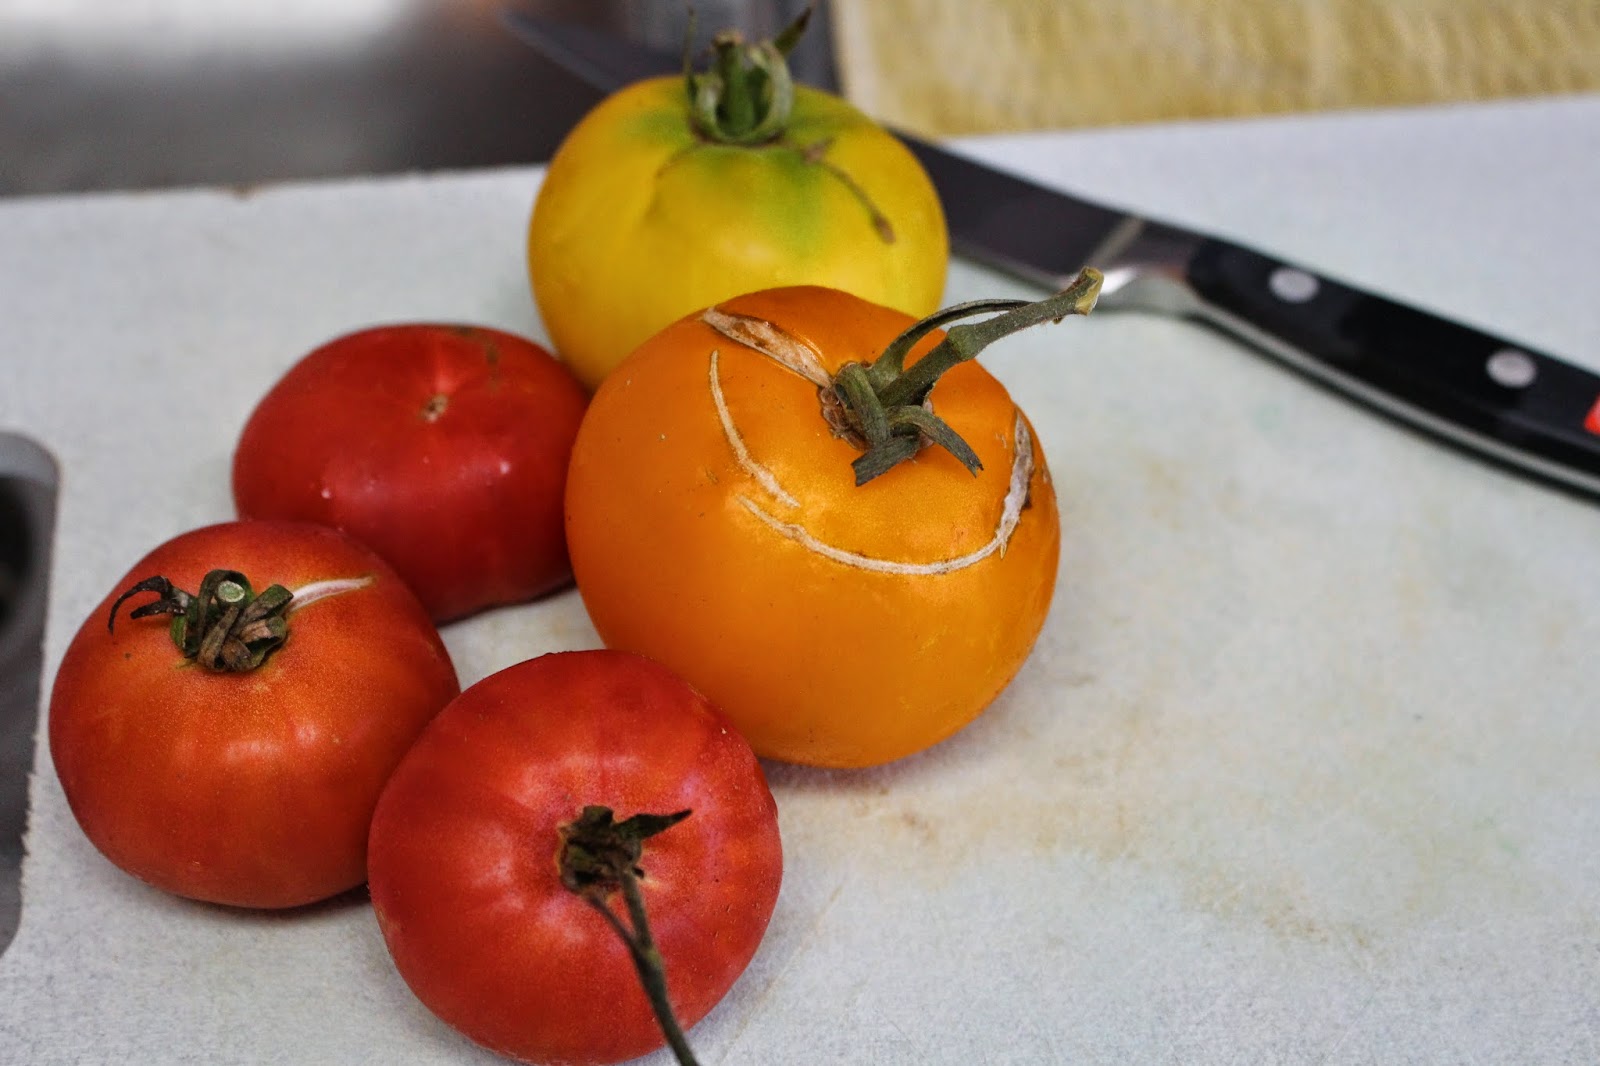
Doesn't get much better than home grown tomatoes right?
avocados
homemade buttermilk ranch (at the end of our fast we used a couple different dressings and they were all really good)
Tabasco


Let me know what toppings you put on your taco bowl.

Wednesday, September 10, 2014

Scones with Buttermilk Syrup


I try to make every Friday night date night. Rarely do we actually go out on a date but I still try to find small ways to make it still feel like it's a date. Sometimes we walk to get ice cream before putting the baby to bed. Sometimes I'll pick up a Redbox to watch. And other times, Tyrone and I lay out pretty much all the blankets we have on the living room floor and we watch The Office all night. We call this concoction of piled blankets, Mega Bed. We are growing kind of fond of it. It's becoming the new weekend tradition.

Anyway, going out on an actual date on Friday night is hard because Tyrone is so exhausted from the week. He tries to stay up but he usually ends up crashing early. This past Friday I thought I would do something special for date night and make scones with homemade buttermilk syrup.

By the time the dough had risen Tyrone was dead asleep on the couch. I ate hot scones with buttermilk syrup all by myself and I had no shame eating seconds. 

I got the recipe for the scones from Make-it-do

Ingredients:
1 cup warm water
1 cup warm milk
1 Tbsp. dry active yeast
3 Tbsp. granulated sugar
1/4 cup melted butter, cooled
1 Tbsp. salt
5 – 6 cups bread flour
Vegetable oil for deep frying


Directions: 

Combine warm water and warm milk.  Stir in the sugar.  Add dry active yeast and stir lightly.  Allow yeast to activate, about 10 minutes.  In a stand mixer, fitted with a bread hook, add milk mixture and melted cooled butter.  Add the salt.  Start the mixer and add the flour one cup at a time until the dough pulls away from the sides of the bowl.  Dough should be slightly sticky but workable.  Cover the dough in the bowl with a towel.  Set in a warm place and allow raise until double.
Pour your oil in a large pan (with sides deep enough to fully immerse the scones) or a deep fryer and heat slowly over medium to medium high heat.  While the oil is heating, roll the dough out onto the counter, without flour, into a large rectangle about 1/2 inch thick. I have tiled counter tops so I sprayed a large cutting board with Pam and rolled the dough out on there.  You may choose to butter the counter lightly.  Using a pizza cutter, cut into squares or triangles.
Heat oil to between 350 – 400 degrees and cook scones until golden brown. It is important that the oil is hot enough. The first couple I made the oil wasn't quite hot enough and it ends up taking longer to cook meanwhile soaking up the oil. They come out soggy. I tossed those ones out. Serve immediately. They taste the best when hot!


I put the scones on a paper towel to soak up a little bit of the oil before I ate them.
I got the buttermilk syrup recipe from Banner boutique

Buttermilk Syrup

Ingredients:
1 cup sugar 
1stick butter 
1/2 cup buttermilk 
2 tbs light corn syrup

Bring these 4 ingredients to a slow boil for 4-5 minutes then take the pan off the heat and add in 1 teaspoon vanilla and 1/4 teaspoon baking soda
I  made the syrup at the last minute because it is so easy and quick.

I don't think I've ever had homemade buttermilk syrup before and it is dang delicious!! 4 ingredients all mixed together will change your life. Anything you topped with syrup will forever be changed. Pancakes, waffles, French toast will now and forever be topped with this delicious buttermilk syrup. 

Tuesday, September 2, 2014

M&M Chocolate Chip Cookies

These cookies don't need much of a description. All you really need to know is that they are delicious. I've never made M&M cookies before and I used a recipe which called for vanilla pudding so I wasn't sure how they were going to turn out. But, they were amazing. I made them when my husband was out of town which was a bad idea. I ate way too many by myself and I had no one else in the house to blame it on. I did give some away which makes me feel a little better but I think I'm going to make these again soon. I got the recipe from Picky Palate.


Ingredients:
  • 1 stick/1/2 cup unsalted butter, softened
  • 1/2 cup granulated sugar
  • 1/2 cup packed light brown sugar
  • 1 large egg
  • 1/2 teaspoon pure vanilla extract
  • 1-1/2 cups all purpose flour
  • 3 tablespoons instant vanilla pudding mix
  • 1/2 teaspoon baking soda
  • 1/2 teaspoon kosher salt
  • 3/4 cup mini chocolate chips- I used regular
  • 1 or 1-1/2 cups mini M&M's

Directions:
  1. Preheat oven to 350 degrees F.
  2. In a large mixing bowl cream your butter and sugars until well combined. Add your egg and vanilla mixing to combine. Add your flour, pudding mix, baking soda and salt, stirring to combine. Add chips and M&M’s stirring to combine.


 3. With a medium cookie scoop, place dough 1 inch apart from each other. Bake for 10-12 minutes until cooked through. Let cool on cookie sheet for 10 minutes before transferring to cooling rack. Enjoy!
I ate one...


Makes 2 dozen cookies

Thursday, August 28, 2014

Italian Sloppy Joes

I had leftover sloppy joe sauce in my fridge and I was trying to figure out what to do with it. I came across this idea from The Pioneer Woman. This worked perfectly to use up our leftovers but I think next time I'll use homemade spaghetti sauce instead.


I used white homemade garlic bread as the base which made it taste amazing. I just put some butter and garlic salt on the bread and put it under the broiler for a few minutes. Then, I topped with the meaty sloppy joe sauce and sprinkled some mozzarella cheese on top. Then I put it back under the broiler for a couple of minutes to let the cheese melt. It was a really quick meal. I think I'm going to work on freezing some homemade spaghetti sauce this week. My husband has been asking me to do it for months and it's just one of those things I haven't gotten around to. Maybe I'll do it over the holiday weekend since he'll be leaving me for a boys trip.


Tuesday, August 26, 2014

5 Minute Salsa

I have bought the ingredients for this salsa probably 5 times now and I always end up the using the ingredients for something else before I end up making it. This time, after I got home from the store I whipped it right up. It was quick and it tasted delicious. I found this recipe from Damn Delicious. You will need a blender.

I have just a small, cheap, two setting blender and when I dumped all the ingredients in there, it filled it to the very top. I was glad I could still get the lid on. If it doesn't all fit you can always blend it in batches and then return it all to the blender at the end and just pulse it for a second to mix it all together. One thing that scared me is that after I blended it, it looked more pink than red as you can see in the picture above. But, after about an hour in the fridge, it all soaked in and settled and it looked normal like the picture below.


 Ingredients:
2- 10oz cans diced tomatoes I used 5-6 medium tomatoes
 1 clove garlic
 1 small red onion, roughly chopped
 1 jalapeño, seeded and roughly chopped
1/2 cup fresh cilantro leaves
 1 lime, juiced
1 teaspoon sugar
Kosher salt and freshly ground black pepper, to taste
Tortilla chips, for serving

 Directions:
  • Combine diced tomatoes, garlic, onion, jalapeño, cilantro, lime juice, salt and pepper, to taste, in blender until smooth.
  • Serve with tortilla chips.


Tuesday, August 19, 2014

Chicken Enchilada Quinoa Bake

I have been wanting to cook with quinoa for a while but it's just so expensive that I've been leaving it on my grocery list every time I go to the store. Finally I just gave in and bought it. This was the first thing I made. I saw it on Pinterest and it made my mouth water. When I'm hungry I should not be allowed to look at recipes, especially dessert recipes! Anyway, this recipe was delicious. I wish I had an awesome Mexican dish like the Pinterest picture though. I will say, it was delicious right out of the oven but it tasted even bettter as leftovers because all the juices soaked into the quinoa. So yummy!

The recipe came from Tablespoon.com

Chicken Enchilada Quinoa Bake

Ingredients:
2 tablespoons olive oil
1 small onion, finely chopped
2 1/2 cups cooked quinoa (white or red)
1 1/2 cups shredded cooked chicken breast
1 can (15 oz) black beans
1 can (4.5 oz) chopped green chiles
1 tablespoon chili powder
2 cups enchilada sauce (from 19-oz can)
1/2 cup shredded sharp Cheddar cheese (2 oz)
1 cup shredded pepper Jack cheese (4 oz)
Sour cream or plain Greek yogurt
Sliced avocado
Fresh cilantro
Crumbled cotija (white Mexican) cheese, if desire 


Directions: 
  • Heat oven to 350°F. Spray 13x9-inch (3-quart) ceramic or broiler-proof baking dish with cooking spray.
  • Heat 10- or 12-inch skillet over medium-high heat. Add oil and onion; cook 5 minutes or until onion is soft.
  • Reduce heat to low. Add quinoa, chicken, black beans, green chiles, chili powder and 2 cups of the enchilada sauce; stir to combine. Remove from heat.
  • Stir in Cheddar cheese. Transfer quinoa mixture to baking dish. Top evenly with pepper Jack cheese.
  • Bake 10 to 15 minutes.
  • Turn oven control to broil. Place baking dish about 5 inches from broiler; broil 1 to 2 minutes or until cheese is golden and bubbly. Remove from broiler. Top with sour cream, avocado, cilantro and cotija cheese. Serve immediately.
 
*This recipe is another easy one to prepare ahead and leave in the fridge until you are ready to bake it. It was great for a busy evening.  

Tuesday, June 3, 2014

Spinach Strawberry Vinaigrettte Salad

I love gardening. I get so excited to see things grow. Since Tyrone and I have lived in an apartment since we've been married it has been hard to grow stuff. We were able to grow a few things at our old apartment but not much. Luckily when we moved to our new place in December we now have a small patio area. We've had multiple tomatoes that we've eaten off our tomato plant. I personally don't like tomatoes but my husband and the little one have loved them. Our little guy ate one of the tomatoes like an apple. It was really cute.


 I also planted cilantro and basil, both of which taste and smell delicious. I just recently bought a strawberry Topsy Turvy since our patio has hooks overhead to hang plants. We got our first ripe strawberry and I shared it with our little guy. It was delicious.

We ate it directly off the plant. It tastes better that way.
 Hopefully we get some more! He LOVES any kind of berries. Another plant that I've loved having is lettuce. It is really fun to go outside and get some lettuce for a salad. It feels so healthy and fresh! Recently I came across this salad dressing recipe and I have made this salad 4 times now. I originally found this dressing recipe because I was looking for a recipe that didn't have sugar in it. I had invited or friends over for dinner one night and they were on the whole 30 diet so I wanted to make sure that they could eat everything we were having. I found the recipe at Food.com


Ingredients:

2/3 cup extra virgin olive oil
1/3 cup red wine vinegar
1 clove garlic (crushed)
1/2 teaspoon salt
1/4 teaspoon fresh ground pepper
 
I like to put all of the ingredients into a mason jar. Then, I put the lid on and shake it up. It doesn't get much simpler than that.
I usually make this salad with spinach and strawberries but I didn't have any spinach tonight so I made it with the lettuce from my garden. It's yummy both ways but I like it best with spinach.

Sunday, April 20, 2014

The BEST Stuffed Bell Peppers yet!

I have been wanting to make stuffed bell peppers recently but I was having a hard time finding the right recipe. I finally found one I liked but I still modified it a bit. I've made it twice already. It is pretty easy to make and it is so delicious. It surprisingly makes great leftovers as well.  Hope you guys like it. I got the original recipe from I Heart Nap Time.


Ingredients:

4 bell peppers halved length wise, ribs removed
1 cup cooked rice
1/2 pound grown turkey or ground beef
1 small onion
1 large tomato or 2 small tomatoes
1 14 oz can black beans drained and rinsed
1/2 TB cumin
2 tsp salt
1/2 TB olive oil
1/2 cup mozzarella shredded cheese or Italian blend cheese


And by the way, as I've stated before I really dislike tomatoes. But the tomatoes tasted really good in these. The seasoning made them blend right in and I didn't pick a single one out. Wahoo! I'm growing up.


Instructions
  1. Heat olive oil in a large saucepan. Add onion and cook until translucent ( about 3 minutes). Add in meat and cook until browned. Drain any excess grease.
  2. Add in black beans, tomatoes, rice, cumin, salt and pepper if desired. Stir until it's heated through. Try not to eat it by the spoonful. It is so delicious!
  3. Heat oven to 375. Place peppers in 13 x 9 baking dish. Spoon in filling and top with grated cheese. Cover pan with foil and bake for 40 minutes. I put the peppers on a cookie sheet and make a tent with the foil. Either way works.
  4. Remove from oven and enjoy! You can serve it with sour cream or salsa if desired.

Monday, April 14, 2014

Honey Lime Shrimp

I am all about easy make ahead dinners. When my little guy is asleep I try to do whatever I can to get dinner prepared. Yesterday, I decided to make a honey lime shrimp marinade for dinner. It was delicious. I only had enough time to let it marinade for 30 minutes before I cooked it but that was all it really needed because it tasted great. Today, I had a little bit of time this afternoon so I decided to make it again. It only takes about 5 minutes to get the marinade put together and then you just let it sit in the refrigerator until you are ready to cook it and it only takes a few minutes to cook. What could be easier?


I originally wanted to cook the shrimp on the grill but I was too anxious to eat it that I just dumped the whole bag of shrimp with the marinade into the pan to cook. It was delicious. I followed the recipe and just used 1/2 lb of shrimp but it was not really enough for two people. We each got about 7 pieces of shrimp. I would suggest doubling the recipe for two people.

I got the recipe from The Dough Will Rise Again


Ingredients:
1/2 pound large shrimp, peeled and deveined
1/4 cup olive oil
2 T honey
juice of one small lime, or half a large lime (2-3 T)
zest of one small lime, or half a large lime
2 cloves garlic, smashed
1/2 tsp kosher salt
1/4 tsp black pepper
1/4 tsp red pepper flakes

Directions:
1.) In a large ziploc bag, combine all the marinade ingredients. When everything is well-combined, add the shrimp, squeeze as much air as possible out of the bag, and close it up. Place it in the fridge.


2.) Let the shrimp marinate for 30-60 minutes, flipping the bag around once or twice during that time, so that all the shrimp stay evenly covered in the marinade.

3.) When you’re ready to cook, take the shrimp out of the fridge and let them sit at room temperature for about 10 minutes. Heat a large skillet over medium-high heat; there is no need to add any oil or butter to the pan, as the marinade has enough oil in it to keep the shrimp from sticking to the pan. (If you would prefer to use the grill for these, you can thread them onto skewers and toss them on the grill at this point.)


 4.) Add your shrimp to the pan in a single layer, making sure they are not too crowded; you can always cook them in more than one batch. Let them cook on one side for about a minute, until they curl up and start to turn pink. Flip them over, and cook for another 30 seconds or so, until the shrimp are opaque. Remove from the pan, and serve immediately!

I served our shrimp with a ceasar salad and green bean casserole. It was a great meal that took little preparation. I love those kind of dinners!

Monday, March 31, 2014

Spray Painted Sugar Cookies

I know Valentine's day is long gone but I was asked to make heart shaped sugar cookies for a church activity last week. I was kind of excited because I bought some fun Wilton heart shaped cookie cutters a few years ago and I still haven't used them. This gave me the perfect reason to test them out. They were awesome. They came in a 4 pack of different sizes and two of the edges were straight and two of them had "squiggly" edges. I don't really know how to describe them. You can see the different outlines of the hearts in the pictures.

I also bought these awesome Wilton color mist cans a little while ago and I have only used them once. They look awesome. Everyone kept asking me how I got the cookies to look like that. It is really easy to use. Just make sure to keep the can about a foot away when you spray the cookies or they'll be splotchy and the color will run. You also want to put the cookies on a cookie sheet when you do it.


The recipe and frosting I used came from In Katrina's Kitchen

This recipe was awesome because I made the dough and baked the cookies all within an hour. It's a great recipe to work with when you are crunched for time and everyone said that they were delicious. I made 30 cookies and I only came home with 6.


The sugar cookies and frosting both call for almond extract which I didn't have. They tasted great without it but maybe next time I'll try it.

Ingredients:
1 Cup butter, softened
1 Cup granulated white sugar
1 teaspoon vanilla extract
1/2 teaspoon almond extract
1 egg
2 teaspoons baking powder
3 cups all purpose flour

Directions:
  1. Preheat oven to 350° F.
  2. In the bowl of your mixer cream butter and sugar until smooth.
  3. Beat in extracts and eggs.
  4. In a separate bowl combine baking powder with flour and add a little at a time to the wet ingredients. The dough will be very stiff. If it becomes too stiff for your mixer turn out the dough onto a counter top surface. Wet your hands and finish off kneading the dough by hand.
  5. DO NOT CHILL THE DOUGH. Divide into workable batches, roll out onto a floured surface and cut. You want these cookies to be on the thicker side (closer to 1/4 inch rather than 1/8).
  6. Bake at 350 for 6-8 minutes. Let cool on the cookie sheet until firm enough to transfer to a cooling rack.
I used her butter cream frosting recipe found here. It was the best cookie frosting I've ever worked with. It was the perfect consistency of soft but not too soft. I was able to stack the cookies without the frosting sticking to the other cookies. I will warn you though that this recipe makes a ton! I have enough frosting for probably another 6 dozen cookies. I have no idea what I'm going to do with it all.


Butter cream frosting
Ingredients:
  • 2 Cups shortening
  • 1 Tablespoon vanilla extract
  • 1 teaspoon almond extract 
  • 8 Cups powdered sugar
  • 1/8 Cup heavy cream (more or less to desired consistency) (I didn't have any so I used 2% milk)
  •  food coloring, if desired  
Directions:
      1. In the bowl of your mixer beat shortening until smooth and creamy.
      2. Mix in vanilla (and almond extract if using).
      3. Add powdered sugar (1 cup at a time) until combined, then add  cream & mix until smooth and                    spreading consistency. Adjust cream to desired frosting thickness
      4. Add a few drops of color, if desired.


Tuesday, March 25, 2014

Pepperoni Penne

I am either really prepared for dinner, or my husband is on my way home and I'm looking in the cupboards, the fridge, searching pinterest, etc. trying to figure out what I'm going to make. I decided to make this and it was quick, easy and tasted so yummy.

I got this recipe from AllRecipes.

Now, I wasn't sure how this meal was going to turn out. I was kind of on the edge about even making it because it sounds a little bit like a kid's dish. Pepperoni penne? Anyway, it turned out really good and it tasted really fresh. When I served it to my husband he said, "This is Cheesecake Factory status."


I chopped up everything up ahead of time so when we were ready to eat, it only took about 15 minutes to make. I added a chopped green bell pepper because I had one chopped up in the fridge and I think it made the dish taste really yummy. I added it in with the shallot and garlic.I would also recommend making a little less than 16 oz of penne to go with it. A lot of the reviews said that there wasn't enough sauce with that much pasta. I made about 12 oz or 3/4 of a 1 lb box of penne. It was the perfect amount. 

On a side note, I do not like tomatoes. I usually pick them out of things when I can taste them. The tomatoes made this sauce really yummy without being too powerful. I ate them without even noticing. Maybe you can trick your kids. Or, if you're like me, maybe you can trick yourself. It probably helps that we used tomatoes from our garden too.

I'm so proud of our tomatoes. Ever since we moved our tomato plant has been growing like crazy!


Ingredients:
3/4 lb sliced pepperoni sausage (I used Hormel sliced pepperoni's because that's all I had)
2 tablespoons minced shallots
4 medium tomatoes- peeled, seeded, and chopped
1 clove garlic, minced
1/4 cup chopped parsley
1 cup heavy cream
1 (16 oz) package penne pasta
2 tablespoons grated Parmesan cheese

Directions:
1. Cook the penne according to the package directions.

2. In a large skillet saute the pepperoni until crispy (about 5-8 minutes). Drain all but 1 tablespoon of the grease. Add the shallot and garlic. Cook until translucent. Stir in the tomatoes and simmer for about 3 minutes.

3. Stir in the cream and cook until reduced (about 8 minutes). Add the parsley and remove from the heat.

4. Add the drained pasta and toss. Garnish with Parmesan cheese.

Saturday, March 22, 2014

Grilled Chicken Fajita Kabobs and Balsamic Vinaigrette Salad

I have the hardest time cooking on the weekends. The weekends are a time to relax and recover. Sometimes I feel like I eat junk food all weekend because I'm too lazy to make something. This weekend I decided to plan ahead so that this didn't happen. I wanted something easy but delicious. I would agree that this met both of those criteria. I will definitely be making this again.

I cut up the peppers onion and chicken in the morning and placed them in the marinade. Then, when we got hungry inn the evening we put it on skewers, threw it on the grill and while it was cooking, I made the salad. Pretty simple. 

Marinated Grilled Chicken Fajita Kabobs
Recipe credit to Dashing Diet


Ingredients:
2 Tbsp olive oil
1 Tbsp fresh lime juice
2 tsp chili powder
2 tsp cumin
1/2 tsp garlic powder
1/2 tsp dried oregano
1/4 tsp salt
1/4 tsp pepper
1/4 ts red pepper flakes
2 lb chicken
bell peppers
onions

Directions:
Cut up peppers and onions into squares. I used green peppers because it was all I had, but you can make it as colorful as you want. Cut up chicken into squares. Place all other ingredients into a zip lock bag and mix around. Then, place chicken, onions and peppers into the marinade.

Let the chicken, onions and peppers marinate for at least 2 hours. Then, place the chicken, onions and peppers onto skewers and grill on medium high heat until done, about 8 minutes. Flip over half way to evenly cook all the way through.    


I paired this with a healthy Balsamic Vinaigrette salad.


Ingredients:
1 head of lettuce (I used green leaf lettuce. I also like it with red leaf lettuce or half green, half red)
1 apple
feta cheese
sliced almonds or pecans
balsamic vinaigrette dressing 

Directions:
wash and cut lettuce. Place into bowl. Cut up apple into small pieces discarding the core and seeds. Sprinkle feta cheese and sliced almonds or pecans over salad. Add dressing a little at a time and mix until combined.


Wednesday, February 19, 2014

Homemade Bread Bowls with Potato Soup


I came across a homemade bread bowl recipe on Pretty Providence and I have been wanting to try it for a while. Well, now that fall has come and gone, I finally decided to make them. The recipe came from Tastes Better From Scratch

Bread bowls:
Ingredients:
2 cups + 4 Tbsp warm water
2 packages of active dry yeast (about 2 Tbsp)
1/2 cup butter, melted
2 Tbsp sugar
3 tsp salt
6 1/2 cups all-purpose flour
In a large bowl add warm water and sprinkle in yeast. Set aside to “proof” or get foamy, about 10 minutes.  Add melted butter, sugar and salt and mix until combined.  Gradually add flour.  Knead with your mixer or by hand for about 5 minutes until dough is smooth and elastic. (you could do this by hand if you weren’t using a mixer, but it may get a little tiring!). Place in a large greased bowl. Cover, place in warm place and allow to rise until doubled, (about 45 minutes). After first rise punch dough down and form into 6 equal sized balls.  Place dough balls on a greased cookie sheet and lightly cover with plastic wrap. Let rise once more for about 20-30 minutes. DO NOT touch the dough at all during this time. Preheat oven to 425 degrees F and bake for 20-25 minutes, or until golden brown.  Let cool and then cut off the top, remove some of the bread from the inside and fill with your favorite soup! 


This recipe makes 6 bread bowls.
I used two bread bowls for dinner and froze the other four for the next time I need them. 

These rolls are really moist and delicious. When I  was scooping out the middle, I really had to hold myself back from eating it all. The center is the best part!


I made potato soup to go with the bread bowls, but there are so many options. This potato soup recipe came from my brother's cooking class in high school. As you can see, this recipe has gotten quite a bit of  use. I keep it in a plastic sheet protector now. At one point in college, the top right corner actually caught on fire because it was a little to close to the stove. I also thought the recipe was a good place to practice my signature, apparently.


Cream of Potato soup:
Ingredients:
2 medium potatoes, peeled and diced
3 Tbsp margarine
3 Tbsp flour
1/2 tsp salt
1/4 tsp celery salt
1 Tbsp dried onion
1/4 tsp pepper
2 cups hot milk (2 minutes in the microwave)
grated cheese for garnish

Directions:
Peel and cut up the potatoes into small cubes. Put in small pot with just enough water to cover the potatoes and cook (boil) for 10 minutes or until tender.

Drain the cooked potatoes in the colander and then return them to the small pot. Mash slightly with the potato masher.

In the medium pot melt the margarine on medium heat. Add the onion, salt, celery salt, and pepper. Stir with wire whisk. Add the flour and stir until the flour is absorbed into the margarine mixture.

When the butter begins to melt, put the milk in the microwave. Once the flour gets absorbed into the margarine mixture, if the milk isn't ready, it burns really easily and then you have to start over. This is the hardest part. I would also recommend having the spices and flour already measured out before this step to make it easier.  

Add the hot milk (milk should be heated in microwave for 2 min.) and turn the heat up to medium high or high. Stir constantly with the wire whisk until the milk boils and starts to thicken. Remove from the heat.

Add the potatoes to the milk mixture and stir until well mixed. Serve with cheese on top if desired.


Tuesday, January 14, 2014

Flank Steak Marinade

Tyrone and I got a grill for Christmas and we love it. One of our favorite grilling recipes is flank steak. This was a meal that my mom cooked a lot for us growing up. It is one of  my favorites. I called her in college to get the recipe and once I found out how easy it was, I loved it even more. I know most of the people out there are freezing this winter with the cold temperatures but it's been pretty warm here in Southern California. I feel like it's summer time. For those of you who can access your grills without having to tread across ice and snow... this is a great recipe. For those of you who are freezing, you can save it until summer time. I probably made this almost once a week in the summer time.


Ingredients: 
1 flank steak- sometimes certain grocery stores don't have it out. If you don't see it ask the butcher and they can usually get you one.
1/2 cup oil
1/2 cup fresh lemon (I usually just squeeze one lemon into the marinade with a fork)
1/2 cup soy sauce
2 cloves fresh garlic, minced
salt to taste
Directions: 
put all of the ingredients into either a pyrex dish or a ziplock bag. Let marinate for at least 2 hours. I usually do it the night before. Then, heat up the grill to about 400 degrees. Grill each side of the meat for about 5 minutes on high heat and it's done. We like our meat a little bit red in the middle. If you want it cooked more on the well side, cook for about 6-7 minutes on each side. After you pull the meat off the grill, cut into thin strips cutting against the grain of the meat. 

This is great for big barbeques because it feeds a lot of people. I usually make baked potatoes and a salad to go with it. It turns out being a delicious meal with little preparation.


Tuesday, January 7, 2014

Creamy Tomato Soup and Grilled Cheese

After I had my baby a friend of mine brought me a warm round bread loaf straight out of the oven along with some tomato bisque soup from Trader Joe's. I'm not really a tomato person though. It's probably one of the only foods that I think tastes absolutely gross by itself, at least. So, tomato soup has never really tastes good to me. But she brought me this wonderful smelling warm bread and I needed something to dip it in. I warmed up the tomato soup and dipped the bread into it. It was delicious! I think I ate the whole box of soup in two days. Ever since then I have been craving tomato soup. I decided to make some this week. It is really simple and easy.

Ingredients:
2- 14oz cans Del Monte diced tomatoes with basil garlic and oregano
1 Cup chicken broth
1/4 Cup butter
2 Tbs sugar
2 Tbs onion, chopped
1/8 tsp baking soda
1.5 Cups heavy cream


Sautee the butter and onions in a large saucepan. Mix in the tomatoes, broth, sugar and baking soda. Turn heat down to low and simmer for 30 minutes. Heat cream separately and add to tomato mixture just before serving. Puree the tomato mixture for a smooth soup.

TIP: I poured my tomato mixture into my blender when it was still hot and I think because it was so full some of the hot tomato mixture flew out of the top and burned the palm of my hand as well as sprayed red tomato sauce all over the front of me and all over the kitchen. I was already having kind of a rough day so I was not very happy. I would recommend blending up half the tomato sauce in the blender at a time if you have a smaller blender like me. I ended up putting a kitchen towel over the lid on the blender and finishing the job. Other than this little hiccup, this recipe was really easy and tasted great as a leftover.

Now, when I think of tomato soup I always think of grilled cheese. In college I would go over to my husband's apartment for lunch sometimes and he would make grilled cheese and soup. 
Then, when my mother in law was staying with me after I had my baby she made my husband and I grilled cheese sandwiches for lunch one day. She added a little bit of cream cheese in the middle though which tasted so delicious!! 

Grilled cheese sandwiches are pretty simple just DON'T BURN THEM! They burn really quickly if you aren't paying close attention. 

Ingredients:
2 pieces sandwich bread
Butter
Cheese, sliced - I use Colby jack but it can be done with any cheese of your choice
Cream cheese

Directions: 
Put butter on both sides of sandwich bread. Any sandwich bread will do. Place your pieces of bread down on a pan over medium heat or you can make them on a griddle which is my favorite way. Then, add sliced cheese and cream cheese to the top of one piece of bread. After about 30 seconds put the piece of bread without cheese on it on top of the cheese with the toasted side facing out. Leave on the griddle until the cheese is melted, about a minute. Make sure not to burn the bottom. It's as simple as that.

Wednesday, December 18, 2013

Pinto Beans and Polska Kielbasa

We are finally moved in. It was a three day process but it's finally done. The movers came and packed up our apartment one day, loaded the truck the next, and delivered all of our stuff at our new place the third day. But, on top of the craziness of moving, I got the flu the day they unloaded the truck. I hadn't been feeling well all morning but I really wanted to get as much unpacked and organized as I could. Finally I really thought I was going to hurl so I laid on the couch, which luckily came off the truck first, and I tried to take a nap. Then, sure enough, just after the movers left, I was sick all day. Great way to break in the new place right?

Luckily it was just a one day thing. I was able to unpack a little bit more the next day and go to Tyrone's holiday party. After the holiday party we headed back to our old apartment to pick up the last of our things that the moving company couldn't take for us and then we headed home. We didn't get home until about 12:30am. We were exhausted.

Then, Sunday after church Tyrone was dying for a home cooked meal because we had eaten out for almost a week straight. I looked in the cupboards and they were completely full but there was nothing in there to make a meal out of. All that was in the fridge was condiments, bottled water, and left over taco meat from Tyrone's work party. To make things simple we had left over taco meat on rice. It worked. That night we were dying for real food. But, with an empty fridge it was hard to make anything. We sadly ate junk food and went to bed.  

On Monday morning I HAD to go to the grocery store! That was the number one priority. I had to at least get the basic necessities. I found Polska Kielbasa on sale that I ended up snagging. I used it that night in a super easy recipe. My house was still not quite put together so I was trying to do a quick, hearty but easy meal. This was a hit. It was great as a left over too. 

,


Ingredients:
1- 16oz bag of pinto beans
8 cups water
1 jar salsa (I used chunky. You could use picante sauce as well)
1 polska kielbasa link, cut into small circles
1 green bell pepper, chopped
1 onion, chopped (optional)
cheese, (optional)

Directions: 
Rinse beans, taking out the rocks and misshaped beans. Place beans along with the water and salsa into the crock pot. Cook on low for 8 hours. Place the Polska Kielbasa, green pepper, and onion into the crock pot for the last hour to cook . Top with cheese if desired.
 

Monday, December 2, 2013

Thanksgiving 2013

Thanksgiving this year was awesome! In June I was getting ready for this new baby of ours and I thought that we should pick a date for his baby blessing in church so that our family could mark their calendars. We decided to bless him on December 1st which would only be a few days after Thanksgiving. With that in mind, we decided to host Thanksgiving here in Huntington Beach. I was not sure how it was going to turn out at all. I've only cooked a turkey once before in college but that's pretty much it.

Thanksgiving morning I put the turkey in the oven roaster and started getting things ready.
I rubbed the outside of the turkey with olive oil and then I seasoned it with an Italian herb seasoning, fresh grated garlic, and salt and pepper. I chopped up half an onion, two carrots, and a celery stick and placed them inside the bird with Italian seasoning as well to keep the moisture in. Then, I cooked it in the roaster oven at 350 degrees for about 4.5 hours.

Mr. Tyrone carving the turkey

To make Thanksgiving fun for the kids I made a turkey vegetable tray and a turkey caramel apple dip. I got the idea for the vegetable tray from Eating with food allergies. Everyone loved it. They were also pretty simple too. Tyrone had to help me with the turkey face on the vegetable tray though. He's much better at artistic stuff than I am.


On the table I used wide wrapping paper that I had found at the dollar store. I had bought brown craft paper at the dollar store a while back but when I went to pick some up they didn't have anymore so I went with the most Thanksgiving looking wrapping paper they had. This was basically the only one that didn't have any sort of Christmas print on it. It worked fine. Then I bought a big roll of ribbon at Sam's Club to tie bows around the back of the chairs. Again, all they had was Christmas ribbon so I went with the most Thanksgiving looking one.


For the table settings I bought napkins at Bed Bath and Beyond. Then, I made some "Give Thanks" burlap napkin rings. I'm not really that good at crafts like this but they ended up turning out really nice. I had a hard time finding the charms to go on the napkin rings like the tutorial shows but I think that just the ribbon looked nice. I got the tutorial from two it yourself.
 
On each plate I placed a small treat bag filled with "acorns." I used a Hershey's kiss, a small nutter butter and a mini chocolate chip held together by peanut butter. I put 6 in each bag. My father in law loved them. He took all the ones that were left on the table and hid them in the bushes. This is not a joke. I'm glad they were a hit.


Overall I think it turned out great! The weather was gorgeous and it was so much fun to have everyone here in Huntington Beach. Our one bedroom apartment was quite squishy at times but no one complained and I think it was nice to have everyone so close. It's going to be hard to say goodbye to this little place. There are a lot of memories here.
The whole family!