Wednesday, November 12, 2014

Chow Mein Noodles- Better than Panda Express

When I saw this recipe I was very hesitant about the "Better than Panda Express," expression. But, you better believe it. A couple days after I made this I ate at Panda Express and their chow mein was not nearly as good. I've made this a couple of times already. It is really easy to whip up on a busy night. Thanks Damn Delicious for the recipe.

Ingredients:
  • 1/4 cup soy sauce
  • 3 cloves garlic, minced
  • 1 tablespoon brown sugar, packed
  • 2 teaspoons freshly grated ginger
  • 1/4 teaspoon white pepper
  • 2 (5.6-ounce) packages refrigerated Yaki-Soba, seasoning sauce packets discarded*
  • 2 tablespoons olive oil
  • 1 onion, diced
  • 3 stalks celery, sliced diagonally
  • 2 cups shredded cabbage- (this was about 1/4 head of cabbage)

 Directions:
  • In a small bowl, whisk together soy sauce, garlic, brown sugar, ginger and white pepper; set aside.
  • In a large pot of boiling water, add Yaki-Soba until loosened, about 1-2 minutes; drain well.
  • Heat olive oil in a large skillet over medium high heat. Add onion and celery, and cook, stirring often, until tender, about 3-4 minutes. Stir in cabbage until heated through, about 1 minute.

  • Stir in Yaki-Soba and soy sauce mixture until well combined, about 2 minutes.
  • Serve immediately.

Notes
*Yaki-Soba is ramen-style noodles and can be found in the refrigerated aisle of your local grocery store. My local Ralphs didn't have it but Vons did. The Yaki-Soba noodles I found came in a package with 3 (5.6 oz) packages. 
Other than finding the right noodles, this recipe is a piece of cake. It tasted great by itself but I'm going to pair it with beef and broccoli next time.


Wednesday, October 8, 2014

Taco Bowls

My husband and I tried to go on a fiscal fast for a month. We tried to see if we could live off of our food storage for a month. First of all, we had so much food in our cupboards we really needed to clean it out. Also, it was a good challenge to see if we could do it. We agreed that the only thing we would buy would be milk. If you know my husband, he can't live without his cereal. The day before we began, I went to the store and got a ton of fruits, vegetables and eggs. We ate the fruit right away but surprisingly the veggies lasted a long time. Some of the veggies I froze but we had veggies up until the last day of the month. It was pretty incredible. On the last day of our fiscal fast my husband and I agreed that we ate really well and that we could probably do it another month.

I should probably get the extra large tortillas for how much stuff I put in them.


One of the meals that was a go to when I couldn't think of anything to make was taco bowls. I bought these taco tins from Marshall's I think. They are really inexpensive. I think they were $5 for a set of 4 bowls. Anyway, I really like them. You can put olive oil on the tortilla and sprinkle it with chili pepper or garlic salt, or whatever seasoning you want. I usually just spray the tins with Pam and put the tortillas in without seasoning them. It's up to you.

Turn the oven to 450 degrees and put the tortillas in the oven for about 10  minutes. Check on the tortillas and take them out when the edges are beginning to brown.

You do not have to have tortillas to make this!!! By the end of our fiscal fast we were not putting our taco bowl in a tortilla shell but rather a cereal bowl.

Once you have your bowl, put whatever you would like in it. This is usually how I layer it.

cooked white rice
black beans


cheese (it melts on the beans and the rice)
lettuce
tomatoes
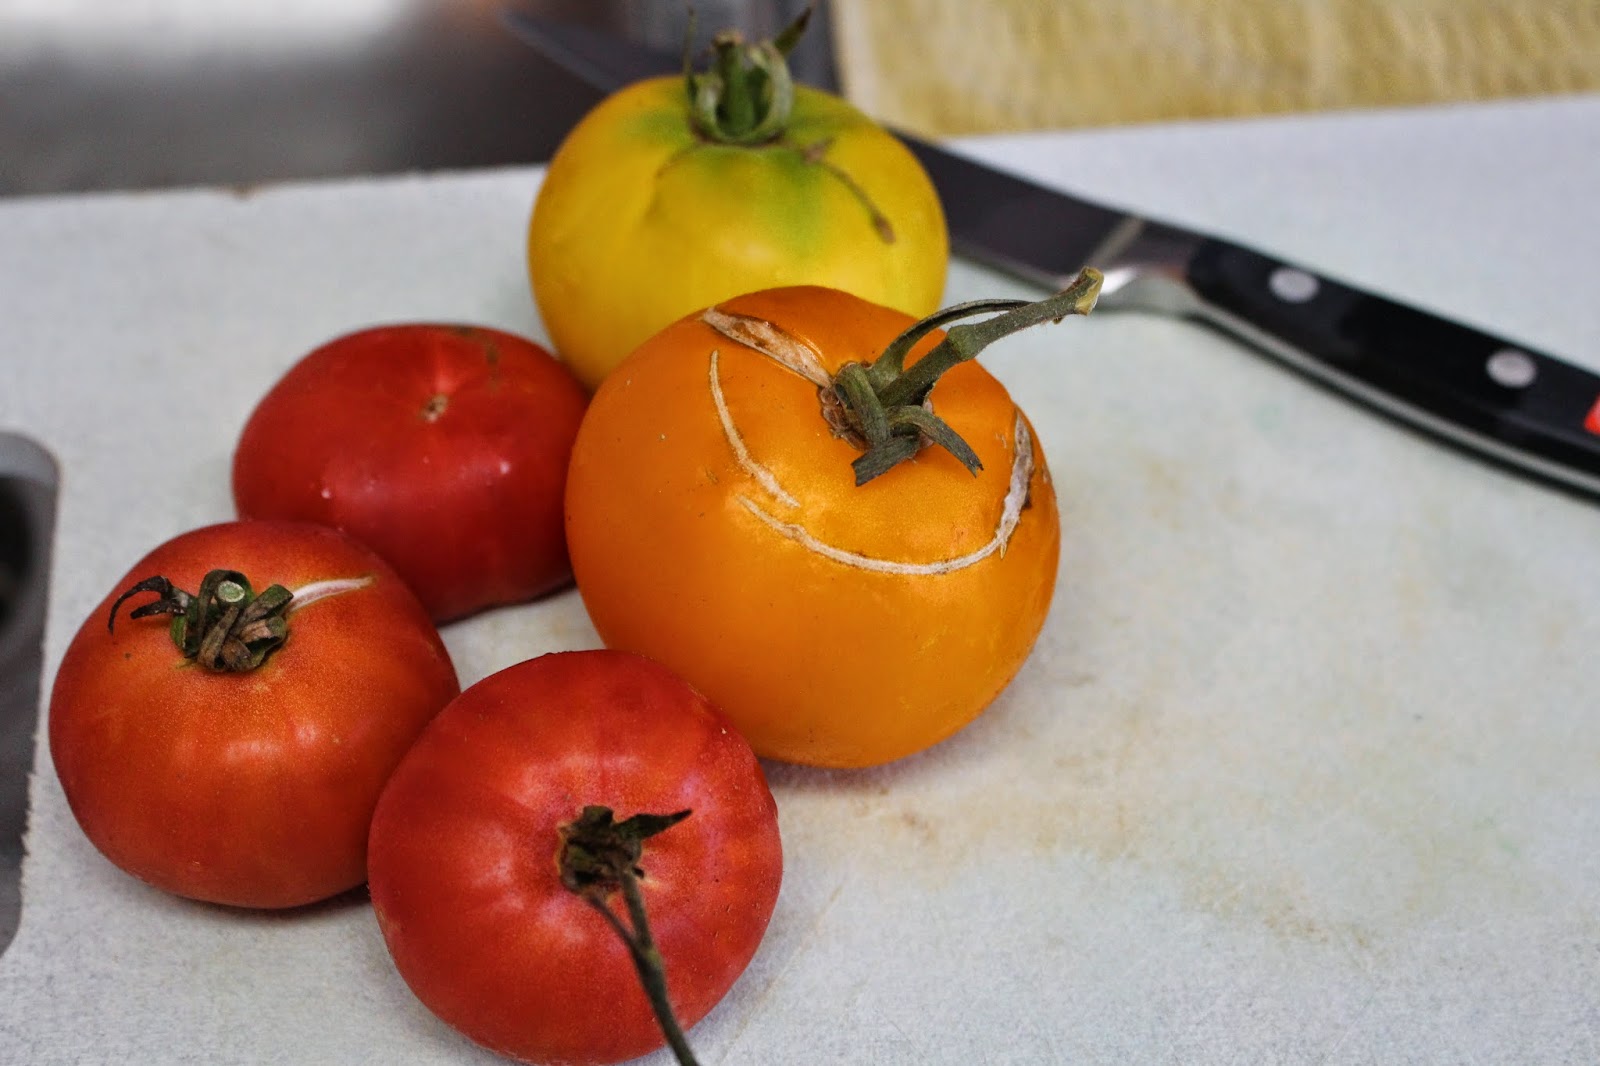
Doesn't get much better than home grown tomatoes right?
avocados
homemade buttermilk ranch (at the end of our fast we used a couple different dressings and they were all really good)
Tabasco


Let me know what toppings you put on your taco bowl.

Monday, September 22, 2014

Jackson's First Birthday


My baby turned one! I can hardly believe it. He is getting so big! Actually he's not that big according to the charts, but he sure is big to  me! Our wedding anniversary happens to be on the same day as our little guys birthday and for the second year in a row, we haven't done much to celebrate. But, we did have a big party for Jackson so I guess that's celebration enough. We had lots of friends come and support. It was perfect. Luckily the weather cooled off just in time because we had been having 97 degree days here with no air conditioning. Let me tell you, our apartment was hot! It ended up being a little bit overcast for the party so we were able to leave the back door open so that people could sit out on the deck.


 I made Jackson's "Birthday Suit" onesie. It was pretty simple. I ironed on the words "Birthday Suit." Then I sewed a little bow tie with Velcro on the back and stuck it on.


I have been wanting to make a tiered cake for a while. Mostly because I just wanted to see if I could do it. So, I decided Jackson's birthday would be the perfect time. My cake does look like a Charlie Brown cake. I am well aware of that. I am almost embarrassed to put up a picture of it, but we all have to start somewhere right? I did it, it may be leaning sideways, but I did it. The cake itself tasted yummy though so don't judge it by its looks.


 Here is Jackson's little smash cake. I put some white star sprinkles on it to give it a little decoration.


The smash cake part was so much fun, even though it was a pain to clean up. He somehow flung frosting all over the kitchen. But he sure did look cute!


Here is our family picture. Jackson was trying to touch me with his frosting fingers and he succeeded.
I had blue frosting all over the side of my shirt.


 Here is Jackson getting cleaned up by dad in the kitchen sink.
Yes, he's trying to grab my camera lens cap with his frosting fingers.

Jackson also officially started walking on his actual birthday. He is a rock star!


I used a recipe from Baking Vintage. I knew I wanted a white cake with cream cheese frosting and when I came across this buttermilk recipe, I thought I would try it. Don't let "folding in the egg whites" instruction scare you. It was really simple.

Ingredients:
1 cup unsalted butter, softened
2 cups granulated sugar
3 cups cake flour
1 teaspoon baking soda
½ teaspoon salt
1 teaspoon cream of tartar
1 cup buttermilk
1 teaspoon vanilla
6 egg whites

Directions:
Preheat oven to 350˚F. Line two 8-inch cake pans with parchment paper, then grease with unsalted butter.

In the bowl of an electric mixer, cream butter and sugar until light and fluffy, about 4 minutes. In a medium bowl, whisk together cake flour, baking soda, salt and cream of tartar to remove any lumps. In a liquid measuring cup, combine buttermilk and vanilla. With the mixture on a low speed, alternate adding the flour mixture with the buttermilk. Beat the batter until smooth.

In a clean separate mixing bowl, beat egg whites until stiff peaks form. Working swiftly, fold the stiff egg whites into the cake bake in three additions. Pour into the buttered cake pans.

Bake for 30-40 minutes or until a cake tester inserted into the middle of the cakes comes out clean. Allow to cool in the pans for one hour, remove from pan and allow to cool fully before frosting with the icing of your choice.

Makes 2 8-inch round cakes

With a double batch I made,

two-8inch cakes,
two 6-inch cakes and
two-4 inch cakes

One of the 6-inch cakes I didn't use and one of the 4-inch cakes I used to make Jackson's smash cake with.

I used a cream cheese frosting recipe from Dessert Now, Dinner Later

Ingredients:
 8 oz cream cheese, room temperature
1/2 cup (1 stick) unsalted butter, room temperature
1 cup powdered sugar
1 tsp pure vanilla extract

Directions:
Place cream cheese in a mixing bowl, beat until smooth.
Gradually add the butter 2 tbsp at a time and continue beating until smooth and well blended
Add powdered sugar and vanilla. Using a hand mixer, mix until combined.


Wednesday, September 10, 2014

Scones with Buttermilk Syrup


I try to make every Friday night date night. Rarely do we actually go out on a date but I still try to find small ways to make it still feel like it's a date. Sometimes we walk to get ice cream before putting the baby to bed. Sometimes I'll pick up a Redbox to watch. And other times, Tyrone and I lay out pretty much all the blankets we have on the living room floor and we watch The Office all night. We call this concoction of piled blankets, Mega Bed. We are growing kind of fond of it. It's becoming the new weekend tradition.

Anyway, going out on an actual date on Friday night is hard because Tyrone is so exhausted from the week. He tries to stay up but he usually ends up crashing early. This past Friday I thought I would do something special for date night and make scones with homemade buttermilk syrup.

By the time the dough had risen Tyrone was dead asleep on the couch. I ate hot scones with buttermilk syrup all by myself and I had no shame eating seconds. 

I got the recipe for the scones from Make-it-do

Ingredients:
1 cup warm water
1 cup warm milk
1 Tbsp. dry active yeast
3 Tbsp. granulated sugar
1/4 cup melted butter, cooled
1 Tbsp. salt
5 – 6 cups bread flour
Vegetable oil for deep frying


Directions: 

Combine warm water and warm milk.  Stir in the sugar.  Add dry active yeast and stir lightly.  Allow yeast to activate, about 10 minutes.  In a stand mixer, fitted with a bread hook, add milk mixture and melted cooled butter.  Add the salt.  Start the mixer and add the flour one cup at a time until the dough pulls away from the sides of the bowl.  Dough should be slightly sticky but workable.  Cover the dough in the bowl with a towel.  Set in a warm place and allow raise until double.
Pour your oil in a large pan (with sides deep enough to fully immerse the scones) or a deep fryer and heat slowly over medium to medium high heat.  While the oil is heating, roll the dough out onto the counter, without flour, into a large rectangle about 1/2 inch thick. I have tiled counter tops so I sprayed a large cutting board with Pam and rolled the dough out on there.  You may choose to butter the counter lightly.  Using a pizza cutter, cut into squares or triangles.
Heat oil to between 350 – 400 degrees and cook scones until golden brown. It is important that the oil is hot enough. The first couple I made the oil wasn't quite hot enough and it ends up taking longer to cook meanwhile soaking up the oil. They come out soggy. I tossed those ones out. Serve immediately. They taste the best when hot!


I put the scones on a paper towel to soak up a little bit of the oil before I ate them.
I got the buttermilk syrup recipe from Banner boutique

Buttermilk Syrup

Ingredients:
1 cup sugar 
1stick butter 
1/2 cup buttermilk 
2 tbs light corn syrup

Bring these 4 ingredients to a slow boil for 4-5 minutes then take the pan off the heat and add in 1 teaspoon vanilla and 1/4 teaspoon baking soda
I  made the syrup at the last minute because it is so easy and quick.

I don't think I've ever had homemade buttermilk syrup before and it is dang delicious!! 4 ingredients all mixed together will change your life. Anything you topped with syrup will forever be changed. Pancakes, waffles, French toast will now and forever be topped with this delicious buttermilk syrup. 

Tuesday, September 2, 2014

M&M Chocolate Chip Cookies

These cookies don't need much of a description. All you really need to know is that they are delicious. I've never made M&M cookies before and I used a recipe which called for vanilla pudding so I wasn't sure how they were going to turn out. But, they were amazing. I made them when my husband was out of town which was a bad idea. I ate way too many by myself and I had no one else in the house to blame it on. I did give some away which makes me feel a little better but I think I'm going to make these again soon. I got the recipe from Picky Palate.


Ingredients:
  • 1 stick/1/2 cup unsalted butter, softened
  • 1/2 cup granulated sugar
  • 1/2 cup packed light brown sugar
  • 1 large egg
  • 1/2 teaspoon pure vanilla extract
  • 1-1/2 cups all purpose flour
  • 3 tablespoons instant vanilla pudding mix
  • 1/2 teaspoon baking soda
  • 1/2 teaspoon kosher salt
  • 3/4 cup mini chocolate chips- I used regular
  • 1 or 1-1/2 cups mini M&M's

Directions:
  1. Preheat oven to 350 degrees F.
  2. In a large mixing bowl cream your butter and sugars until well combined. Add your egg and vanilla mixing to combine. Add your flour, pudding mix, baking soda and salt, stirring to combine. Add chips and M&M’s stirring to combine.


 3. With a medium cookie scoop, place dough 1 inch apart from each other. Bake for 10-12 minutes until cooked through. Let cool on cookie sheet for 10 minutes before transferring to cooling rack. Enjoy!
I ate one...


Makes 2 dozen cookies

Thursday, August 28, 2014

Italian Sloppy Joes

I had leftover sloppy joe sauce in my fridge and I was trying to figure out what to do with it. I came across this idea from The Pioneer Woman. This worked perfectly to use up our leftovers but I think next time I'll use homemade spaghetti sauce instead.


I used white homemade garlic bread as the base which made it taste amazing. I just put some butter and garlic salt on the bread and put it under the broiler for a few minutes. Then, I topped with the meaty sloppy joe sauce and sprinkled some mozzarella cheese on top. Then I put it back under the broiler for a couple of minutes to let the cheese melt. It was a really quick meal. I think I'm going to work on freezing some homemade spaghetti sauce this week. My husband has been asking me to do it for months and it's just one of those things I haven't gotten around to. Maybe I'll do it over the holiday weekend since he'll be leaving me for a boys trip.


Tuesday, August 26, 2014

5 Minute Salsa

I have bought the ingredients for this salsa probably 5 times now and I always end up the using the ingredients for something else before I end up making it. This time, after I got home from the store I whipped it right up. It was quick and it tasted delicious. I found this recipe from Damn Delicious. You will need a blender.

I have just a small, cheap, two setting blender and when I dumped all the ingredients in there, it filled it to the very top. I was glad I could still get the lid on. If it doesn't all fit you can always blend it in batches and then return it all to the blender at the end and just pulse it for a second to mix it all together. One thing that scared me is that after I blended it, it looked more pink than red as you can see in the picture above. But, after about an hour in the fridge, it all soaked in and settled and it looked normal like the picture below.


 Ingredients:
2- 10oz cans diced tomatoes I used 5-6 medium tomatoes
 1 clove garlic
 1 small red onion, roughly chopped
 1 jalapeño, seeded and roughly chopped
1/2 cup fresh cilantro leaves
 1 lime, juiced
1 teaspoon sugar
Kosher salt and freshly ground black pepper, to taste
Tortilla chips, for serving

 Directions:
  • Combine diced tomatoes, garlic, onion, jalapeño, cilantro, lime juice, salt and pepper, to taste, in blender until smooth.
  • Serve with tortilla chips.


Tuesday, August 19, 2014

Chicken Enchilada Quinoa Bake

I have been wanting to cook with quinoa for a while but it's just so expensive that I've been leaving it on my grocery list every time I go to the store. Finally I just gave in and bought it. This was the first thing I made. I saw it on Pinterest and it made my mouth water. When I'm hungry I should not be allowed to look at recipes, especially dessert recipes! Anyway, this recipe was delicious. I wish I had an awesome Mexican dish like the Pinterest picture though. I will say, it was delicious right out of the oven but it tasted even bettter as leftovers because all the juices soaked into the quinoa. So yummy!

The recipe came from Tablespoon.com

Chicken Enchilada Quinoa Bake

Ingredients:
2 tablespoons olive oil
1 small onion, finely chopped
2 1/2 cups cooked quinoa (white or red)
1 1/2 cups shredded cooked chicken breast
1 can (15 oz) black beans
1 can (4.5 oz) chopped green chiles
1 tablespoon chili powder
2 cups enchilada sauce (from 19-oz can)
1/2 cup shredded sharp Cheddar cheese (2 oz)
1 cup shredded pepper Jack cheese (4 oz)
Sour cream or plain Greek yogurt
Sliced avocado
Fresh cilantro
Crumbled cotija (white Mexican) cheese, if desire 


Directions: 
  • Heat oven to 350°F. Spray 13x9-inch (3-quart) ceramic or broiler-proof baking dish with cooking spray.
  • Heat 10- or 12-inch skillet over medium-high heat. Add oil and onion; cook 5 minutes or until onion is soft.
  • Reduce heat to low. Add quinoa, chicken, black beans, green chiles, chili powder and 2 cups of the enchilada sauce; stir to combine. Remove from heat.
  • Stir in Cheddar cheese. Transfer quinoa mixture to baking dish. Top evenly with pepper Jack cheese.
  • Bake 10 to 15 minutes.
  • Turn oven control to broil. Place baking dish about 5 inches from broiler; broil 1 to 2 minutes or until cheese is golden and bubbly. Remove from broiler. Top with sour cream, avocado, cilantro and cotija cheese. Serve immediately.
 
*This recipe is another easy one to prepare ahead and leave in the fridge until you are ready to bake it. It was great for a busy evening.  

Monday, August 11, 2014

My Birthday

The past couple of months I have been getting scuba diving certified. It has been really fun, for the  most part.... Tyrone has been scuba diving for a while and he has been wanting me to get into it but I was a little bit afraid. I am a pretty fearless person. I want to ride the craziest, fastest roller coasters and go sky diving but I don't want to breathe underwater. Maybe it was the water part that scared me the most. I don't know. But, since we live in the perfect place right now, I finally decided to do it. I went to the two classroom sessions and the five pool sessions as well as the four open water dives that are required to get certified. On the first open water dive I felt a little bit nauseous out in the water but when we went down to the bottom I felt better and it ended up being fun. The second open water dive, I was nauseous before we even went to the bottom. I puked before we even went down. Then, once I got to the bottom, I felt really sick again so I had to go to the top where I continued to puke the entire swim into shore. It was awful. I was underwater for maybe 5 minutes. For the last dive I was prepared with the Dramamine. I took it the night before, the  morning of, and in between the two dives we did. It was a blast.


For my birthday Tyrone and I bought all the gear I needed to go scuba diving. We bought some off Craigslist and some stuff from friends. My husband joked about wrapping it but I said that was silly. When I woke up on my birthday Tyrone had created a scuba woman in our living room with a birthday card on it. It was really cute. I loved the scuba woman. I had to enjoy her before the baby woke up though because once he woke up he was crawling all over everything.

To celebrate my birthday we went to Benihana for dinner. It was so delicious. I forgot how amazing that place is. Not only was the food to die for but the entertainment was awesome.


Jackson was a little piglet and he ate almost an entire plate of noodles. He also learned how to drink out of a straw for the first time. Wahoo! I love the little things. 


We did forget his pacifier though and by the end of the night he was quite cranky. The chef scared one of the teenage girls sitting at our table with a rubber chicken and she jumped while the rest of the table laughed. Jackson on the other hand started screaming on the top of his lungs. Luckily he calmed down pretty quick. He was just so exhausted and I think the noise of everyone laughing startled him.


Then, the next night Tyrone and I went out scuba diving. We went out to the same place I got certified. It was so fun. We saw some sheep crab that reminded us of Jackson. Tyrone stuck his go-pro in the crabs face and the crab would move forward and bump into the camera. Then he would back up and proceed to bump into the camera again. He did this a handful of times and I just kept thinking about Jackson. It was the perfect date night. We followed our scuba dive with a Papa Johns Pizza. I love the garlic butter sauce. Tyrone always complains that I don't share. But, it was my birthday.

Friday, June 6, 2014

Happy Birthday Bunting Flag Banner

My fun sister-in-law Erin had told me that she wanted a Happy Birthday banner to hang above her fireplace. I decided that for her birthday I would get her one. I looked on Pinterest and Etsy but I just couldn't find exactly what I was looking for. So, I decided to make one myself. I was really happy with how it turned out and I have actually made a few more since then. I posted them for sale on Etsy and I've made a few custom made ones as well. Here is the link to buy them. If you would like a custom one let me know. I would love to do it. Here is a custom one I made for someone. It turned out really cute. Sorry for the dark pictures. I wanted to get a picture before I shipped it but the lighting in our apartment was terrible.


To start, I used this template from Sweetly Scrapped Art. Then, I used a bold, size 300 font with the letters spelling "Happy Birthday."


The letters become the stencils. I first traced the letters onto the fabric I wanted and cut them out.


Then I sewed the letters onto the center of the triangles.


After I sewed the letters on, I cut two strings of jute. The "Happy banner should be on about 104" of jute. I folded each triangle over the jute and sewed underneath the jute. This makes each flag lay perfectly in place but still  movable on the string. The "Birthday" banner will be longer than the "Happy" banner by about  10-15." I forgot to take an exact measurement.  I then Tied a knot in the top of the two strings to hang them by. I leave an extra foot on each end to hang down because I think it looks cute. You could make your strings shorter and leave that part off. It depends on the look you are going for.


This is the one I  made for my sister in law. I figured it would work for my nieces and nephews birthdays.


Anyway, I hope this is pretty simple for you guys. Let me know if you have any questions. I hope this tutorial was simple enough.  I'd love to see the banners you make. 


Tuesday, June 3, 2014

Spinach Strawberry Vinaigrettte Salad

I love gardening. I get so excited to see things grow. Since Tyrone and I have lived in an apartment since we've been married it has been hard to grow stuff. We were able to grow a few things at our old apartment but not much. Luckily when we moved to our new place in December we now have a small patio area. We've had multiple tomatoes that we've eaten off our tomato plant. I personally don't like tomatoes but my husband and the little one have loved them. Our little guy ate one of the tomatoes like an apple. It was really cute.


 I also planted cilantro and basil, both of which taste and smell delicious. I just recently bought a strawberry Topsy Turvy since our patio has hooks overhead to hang plants. We got our first ripe strawberry and I shared it with our little guy. It was delicious.

We ate it directly off the plant. It tastes better that way.
 Hopefully we get some more! He LOVES any kind of berries. Another plant that I've loved having is lettuce. It is really fun to go outside and get some lettuce for a salad. It feels so healthy and fresh! Recently I came across this salad dressing recipe and I have made this salad 4 times now. I originally found this dressing recipe because I was looking for a recipe that didn't have sugar in it. I had invited or friends over for dinner one night and they were on the whole 30 diet so I wanted to make sure that they could eat everything we were having. I found the recipe at Food.com


Ingredients:

2/3 cup extra virgin olive oil
1/3 cup red wine vinegar
1 clove garlic (crushed)
1/2 teaspoon salt
1/4 teaspoon fresh ground pepper
 
I like to put all of the ingredients into a mason jar. Then, I put the lid on and shake it up. It doesn't get much simpler than that.
I usually make this salad with spinach and strawberries but I didn't have any spinach tonight so I made it with the lettuce from my garden. It's yummy both ways but I like it best with spinach.

Friday, May 30, 2014

It started with a Crib Bumper...


I know this post is pretty late but I haven't been able to find the time to blog lately. Jackson has been needing a lot of attention and when he's asleep I find a ton of other things that need to get done. On a good note though, Jackson is finally sleeping through the night!! He is 8 mo. old now and he's only been sleeping through the night for two weeks. I didn't want to do the cry it out method because it breaks my heart to just hear him cry but for my sanity I had to do it. I did it while Tyrone was on a work trip so that he wouldn't be exhausted at work. The first night I did it, I was pretty much in tears with Jackson. I have become such a baby ever since I became a mother. But seriously, it broke my heart. I just wanted to pick him up and hold him. The next night he did the same thing but I wasn't as emotional. Then, the third night, he just whined for a little bit and then he went back to sleep. Everyone kept telling me it would take three nights and they were right. I totally should have done it sooner. With the next one, I am not going to wait 8 months. That's a long time with no sleep! Oh, and did I tell you that Jackson doesn't really take naps during the day either? That's a whole different story. I won't go into that here. I am just so glad that he is a happy smiling boy.


Anyway, onto the bumpers... About a month and a half ago Jackson started rolling like crazy. He had been rolling for a while but then he started the crazy rolls where he was smacking into the sides of his crib and limbs were getting stuck out of the bars.One day I went in there and he was asleep on his stomach with both of his feet hanging out the bars. Seriously, overnight he got crazy. I started getting worried because we have a metal crib and his rolls weren't quite controlled yet. I didn't want him to get a concussion or something. So, I looked up some crib bumpers online and I didn't really like any of them. They were around $35 on average for simple bumpers and I found them to be kind of ugly. I decided I could just make some. I spent a couple nights finding different tutorials on how to make crib bumpers. I took little bits and pieces from different tutorials and I made my own crib bumpers. I was shocked with how good they turned out. It took me a couple days to make them and three trips to Joann's to get supplies. That's seriously the worst. But, they are done and I love them.


Here is how I made the bumpers:

 
This is the crib foam that I bought from Joann's.


You will need 1 1/4 yd of 2 different coordinating fabrics. Cut 11" strips and sew them together until you have an 11"x 160" strip. You may want to measure your crib to  make sure that your crib is 160" all the way around. 
I then, made the ties for the crib. You can use strips of ribbon but I wanted to make them with the matching fabric. I made my strips 1" wide, folded them over and sewed straight down. They were 1"x 24". I would recommend making them at least 2"x 24". 1" was hard to sew. But, they still turned out great. You will need to make 14 ties. You will want to melt the ends with a lighter so they don't fray.
Start pinning with the right sides facing out. You will pin your first ties just an inch from the edge. Pin ties across from each other every 26" approximately. It helps to pin the ends together in the middle so they don't get sew in somewhere. Start pinning your bias tape onto your two main fabrics. This process takes a long time. I felt like I pinned forever. I actually ran out of pins. I had to go to the store and buy another box of them. I've never used that many before!


Laid out on my floor it went from my front door almost to the  kitchen. There is no way I could have even laid this out in our old one bedroom apartment. It is really long!
I finally finished pinning. I stopped taking pictures after this. I stitched the bias tape on the top and then I stuffed the bumpers with the foam. Finally, I sewed bias tape around the last edge, and ta-da. Crib Bumpers!
You will need 4 packages of double fold bias tape. You need a total of 10 yards. 


Jackson gave me a fist bump to let me know he liked the bumpers.


After I had done the bumpers I decided that if I could make that then of course I could make a crib skirt and sheet to match. So, I made those as well. In all honesty, the crib skirt and sheet were really simple. It only took me a couple of hours to make those.

For the crib sheet I followed the tutorial from Fancy Napkin

The crib skirt was pretty easy you just  need to take measurements of your crib. My crib is 10" off the ground when it's at it's lowest setting. I wanted the crib to almost touch the ground at it's lowest setting. These were the  measurements I used. If your crib is up against a wall, you can just do a single long strip for the front of the crib and leave the back.

Two 53" x 11.5" panels for the long sides
Two 28" x 11.5" panels for the short sides
One 52" x 27" panel for the top- I used white because It's not going to be seen anyway.

 Sew the panels onto the white fabric. Sew with the right side of the fabric facing the white fabric. I then, just tucked each edge underneath and sewed straight lines.


I put the whole crib bedding up for sale on Etsy. If you would like one specially made let me know. I had a lot of fun making it.

My latest project is to make some black out curtains. I have leftover mustache fabric so I  figured why not. When I get it finished I will post pictures.

Sunday, April 20, 2014

The BEST Stuffed Bell Peppers yet!

I have been wanting to make stuffed bell peppers recently but I was having a hard time finding the right recipe. I finally found one I liked but I still modified it a bit. I've made it twice already. It is pretty easy to make and it is so delicious. It surprisingly makes great leftovers as well.  Hope you guys like it. I got the original recipe from I Heart Nap Time.


Ingredients:

4 bell peppers halved length wise, ribs removed
1 cup cooked rice
1/2 pound grown turkey or ground beef
1 small onion
1 large tomato or 2 small tomatoes
1 14 oz can black beans drained and rinsed
1/2 TB cumin
2 tsp salt
1/2 TB olive oil
1/2 cup mozzarella shredded cheese or Italian blend cheese


And by the way, as I've stated before I really dislike tomatoes. But the tomatoes tasted really good in these. The seasoning made them blend right in and I didn't pick a single one out. Wahoo! I'm growing up.


Instructions
  1. Heat olive oil in a large saucepan. Add onion and cook until translucent ( about 3 minutes). Add in meat and cook until browned. Drain any excess grease.
  2. Add in black beans, tomatoes, rice, cumin, salt and pepper if desired. Stir until it's heated through. Try not to eat it by the spoonful. It is so delicious!
  3. Heat oven to 375. Place peppers in 13 x 9 baking dish. Spoon in filling and top with grated cheese. Cover pan with foil and bake for 40 minutes. I put the peppers on a cookie sheet and make a tent with the foil. Either way works.
  4. Remove from oven and enjoy! You can serve it with sour cream or salsa if desired.